How do people post images with text wrapped around them on social media?
If that’s bothering you these days, we have the solution for you!
You might’ve seen promotional or sales ads on Instagram or other social media platforms using the text wrap effect. It makes the images instantly appealing, giving the objects a 3D effect.
But you can’t get to wrap your head around how to use that effect. We’ll be clearing it for you in this article.
Canva makes it simple and free to wrap text around images. You don’t need the pro account to make your sales ads visually appealing.
What are you still holding out for? Let’s look at how to use Canva for text wrapping around images.
Similar: How To Create Glitch Effects in Canva
Canva Text Wrapping Around Images Tutorial
At first, glance, wrapping text around Images in Canva might seem difficult, but the knowledge of basic Canva editing is enough to design your own designs.
The designs don’t even require a lot of time to create. So, here’s how to make any creative ideas you have a reality.
1. Open Canva and select the Instagram Post template
To wrap text around an image in Canva, you can use any template you choose. For this article, we decided to keep the design for an Instagram ad.
Go to Canva’s homepage and select the Instagram Post template.
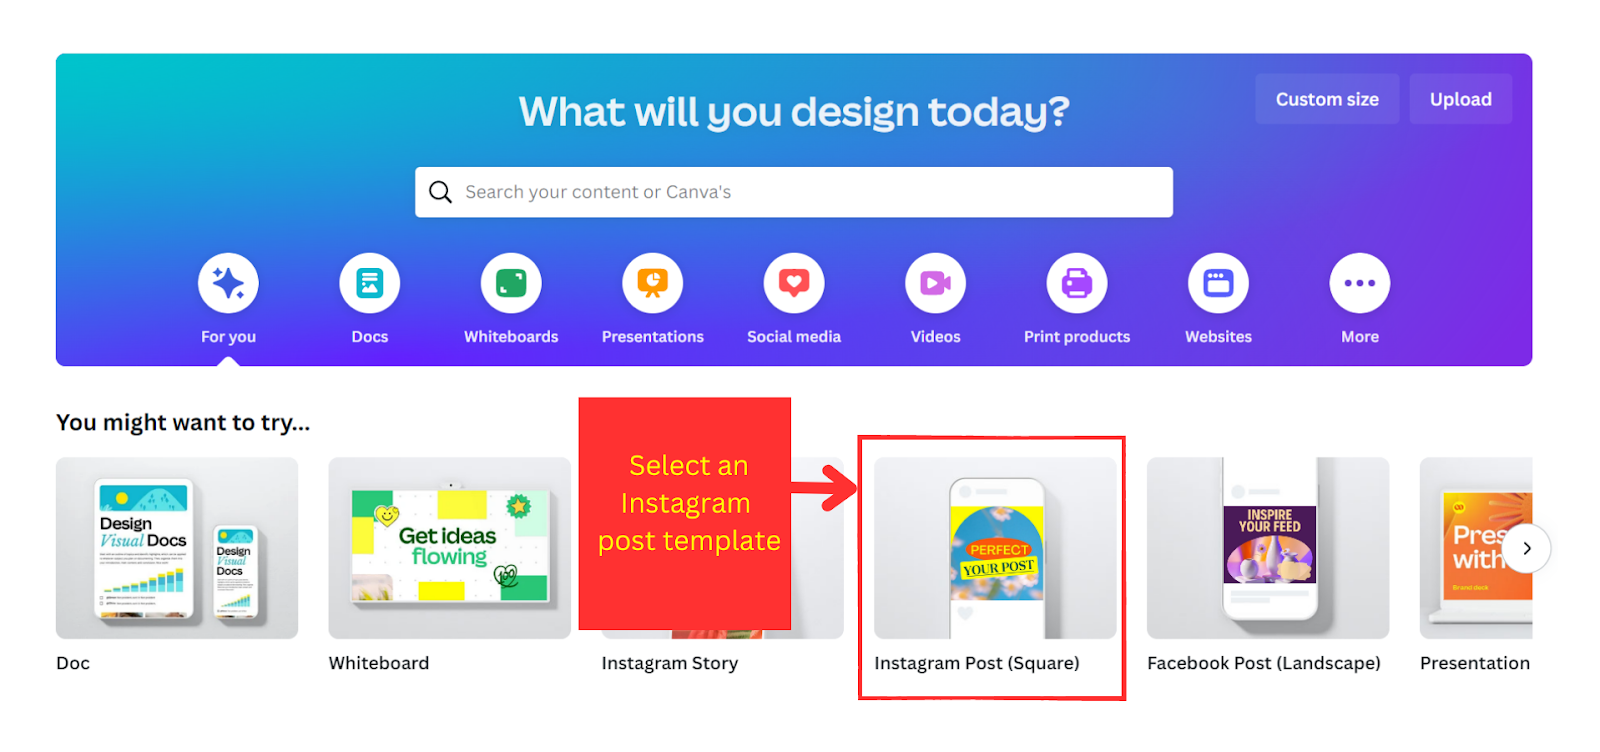
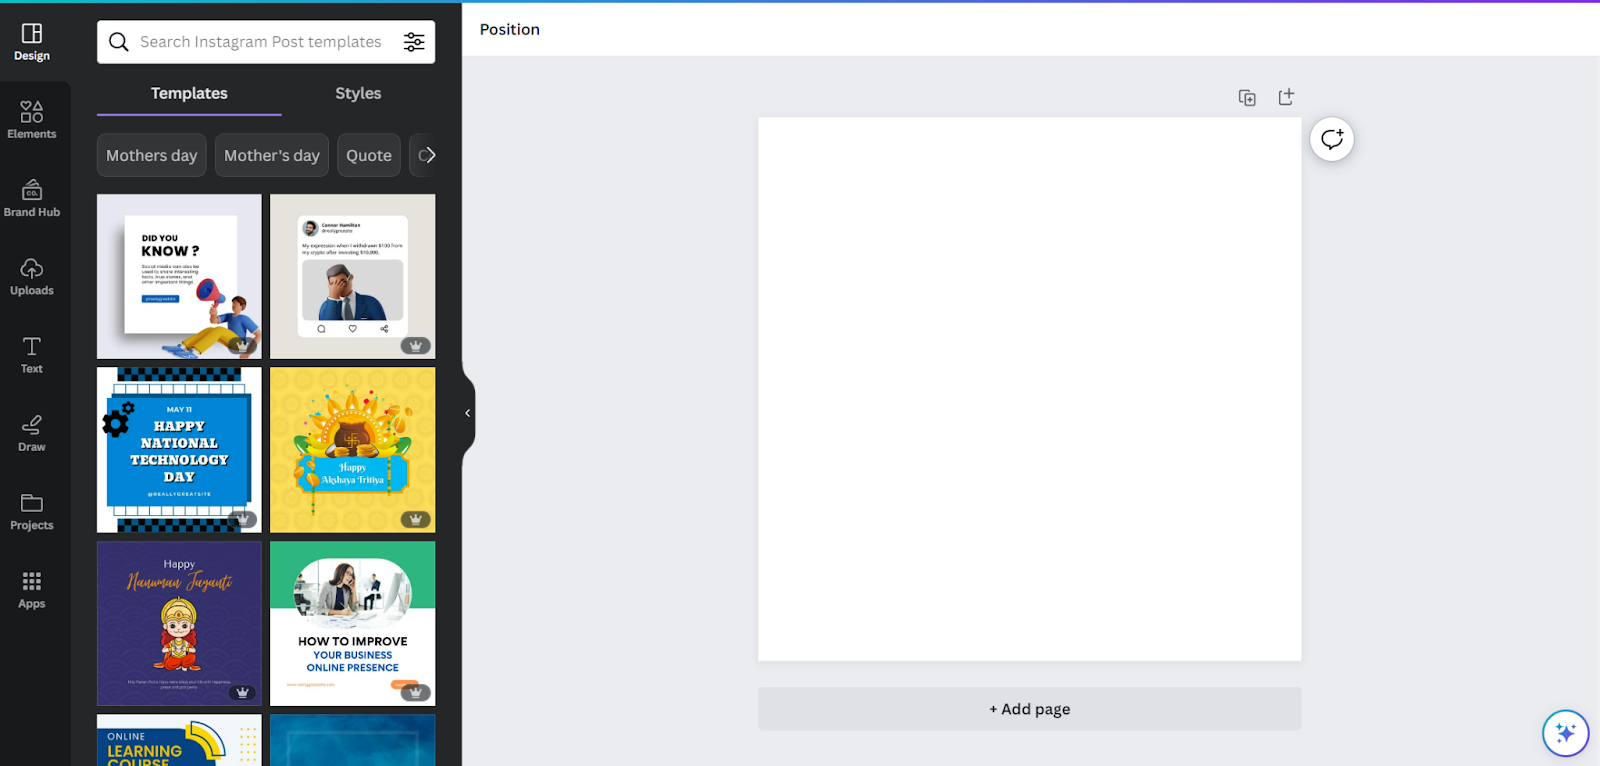
You’ll be redirected to the Canva workspace with the empty template.
The Instagram post template is square-shaped with dimensions of 1080 x 1080 px.
2. Go to “Elements” and search for Product images
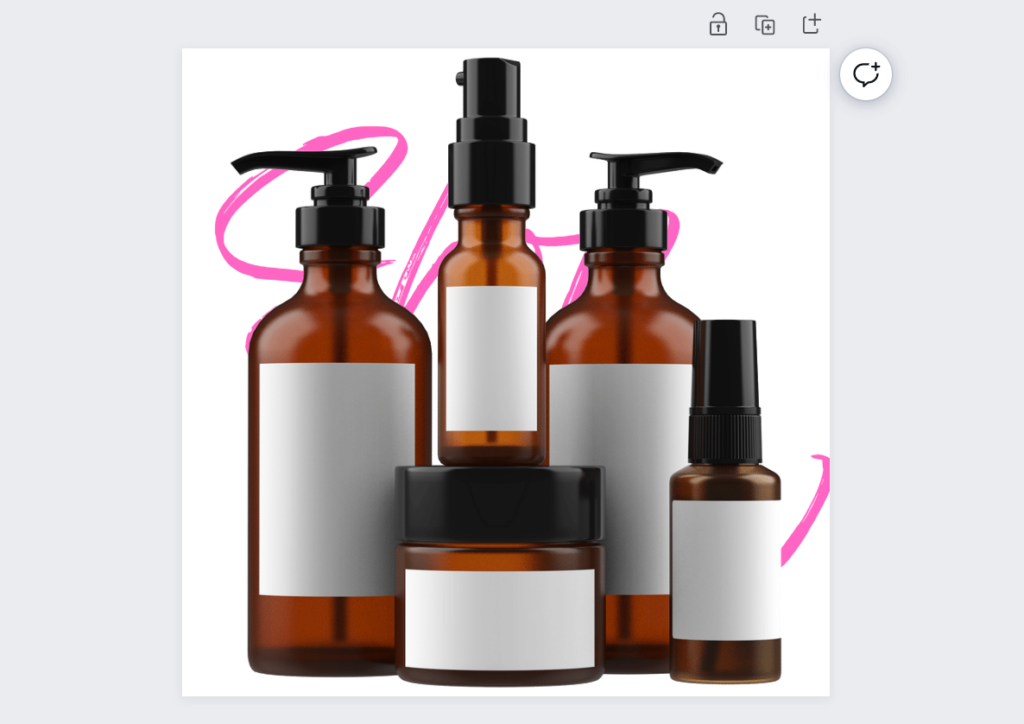
The next step is to add the image you want to wrap the text around. It could be any product you want to advertise.
If you’re going to use a generic image available over the internet, you can simply choose one from Canva’s gallery.
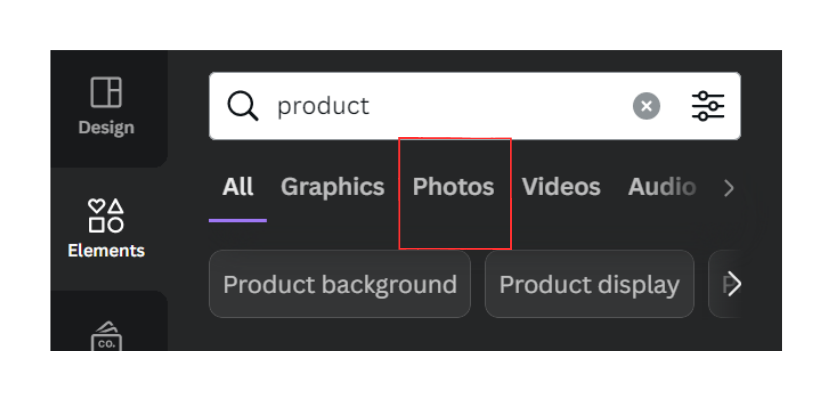
Go to the “Elements” in the left-hand menu bar and type “Products” in the search bar.
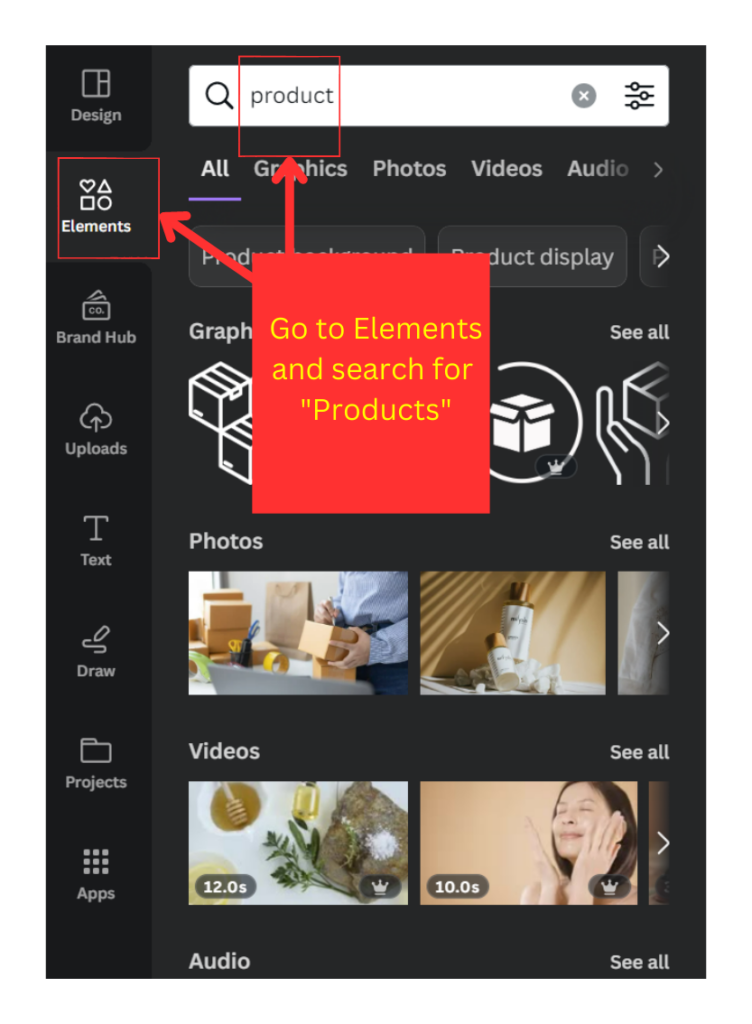
Below the search bar, you’ll get multiple element options to choose from. Select the “Photos” option as we want to use images.
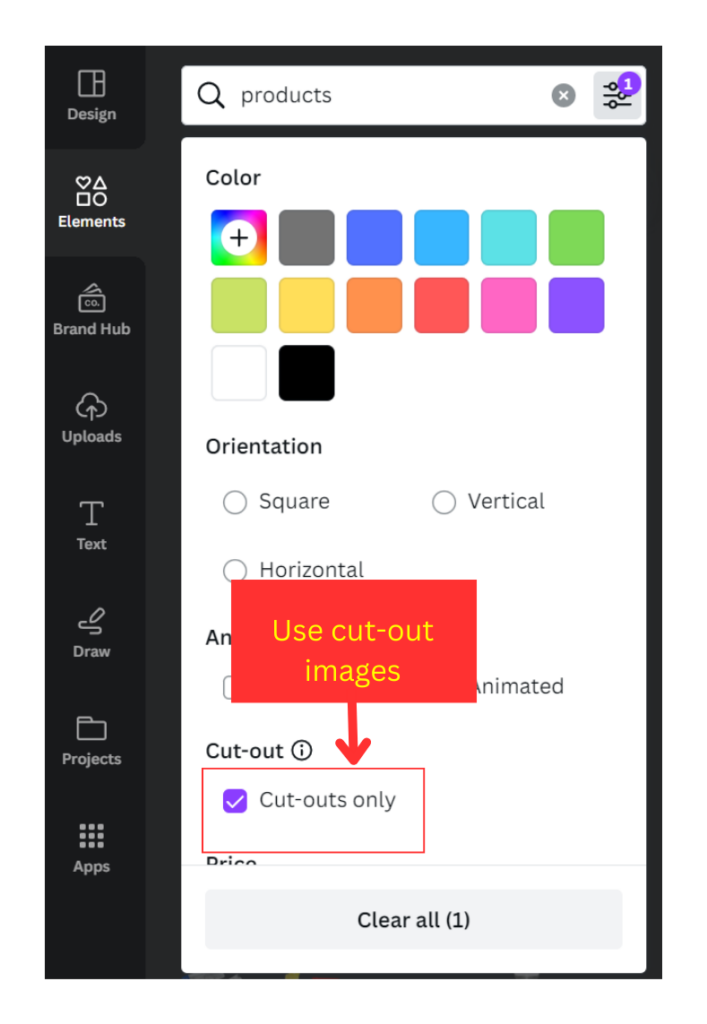
One important step to remember is to use images without background. It’s necessary as an image without a background makes wrapping the text around the image in Canva easy. Images with background reduce the impact of the effect.
Click the “settings icon” in the search bar and check the “Cut-outs only” box. Canva will show you only the images without a background.
If you’re using the images of your products, you can use the background remover software available for free to remove the image background.
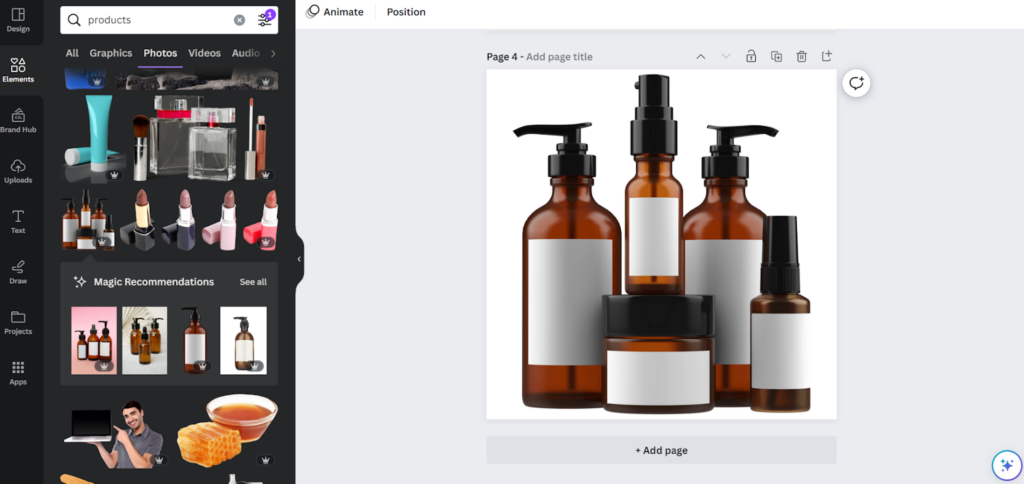
This is how an image without a background will appear on the template.
3. Add text to the template.
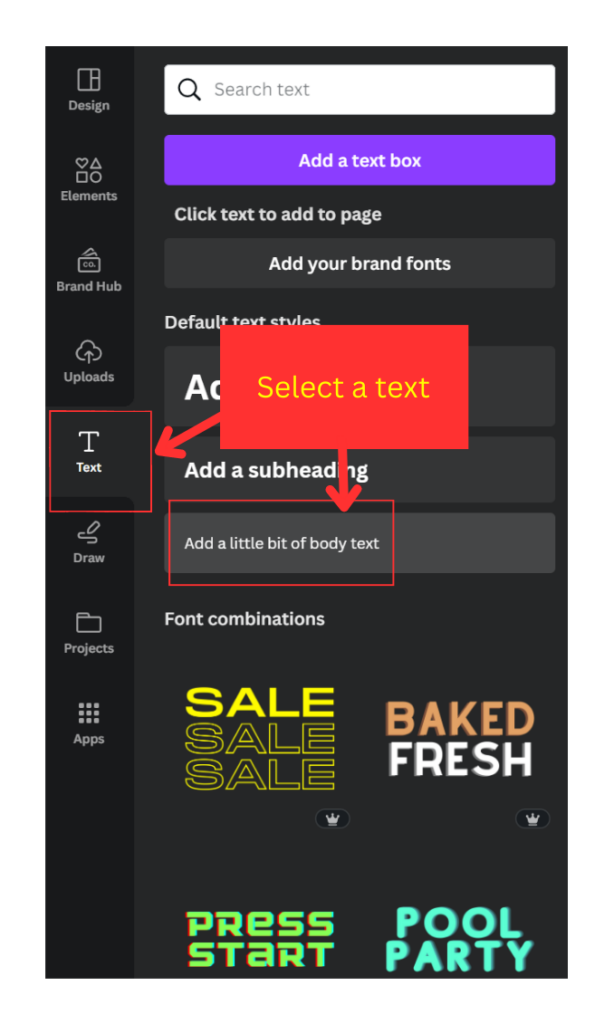
The second part of this task is to add text to the image. Use the “Text” tool from the left-hand side menu and add a text box on the template.
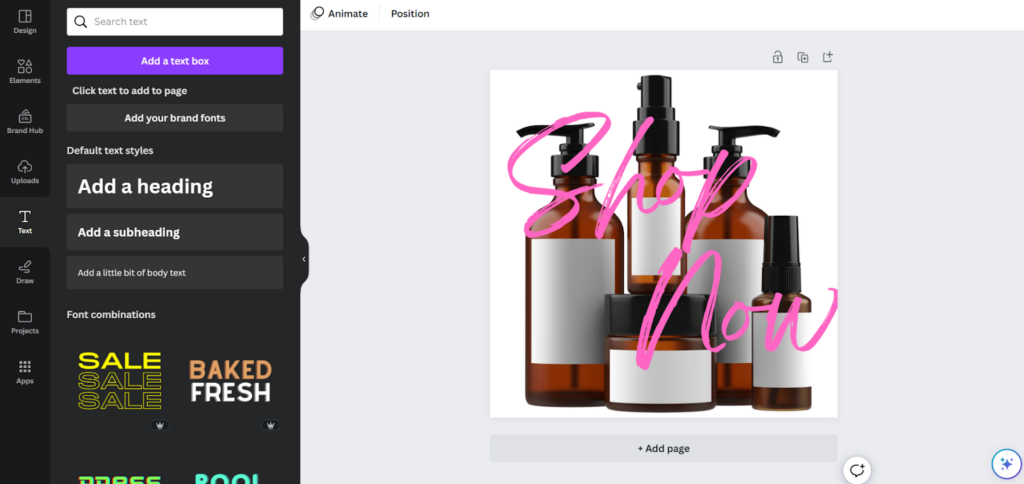
Now, the fun part begins! It’s time to wrap the text around the image.
4. Duplicate the image and add it on the top of the text
Copy the image and paste it on top of the text. As a result, you have all three elements layered on top of one another. The text lies in the middle, with the two images surrounding it from both sides.
5. Crop the duplicate image to give the desired wrapped effect
There’s no fancy effect to wrap text around an image in Canva. You have to manually crop the image on top of the text to make only that part of the text visible that you want to wrap around the image.
To make it look seamless, make sure you’ve aligned the second image on top of the first to fit its edges perfectly.
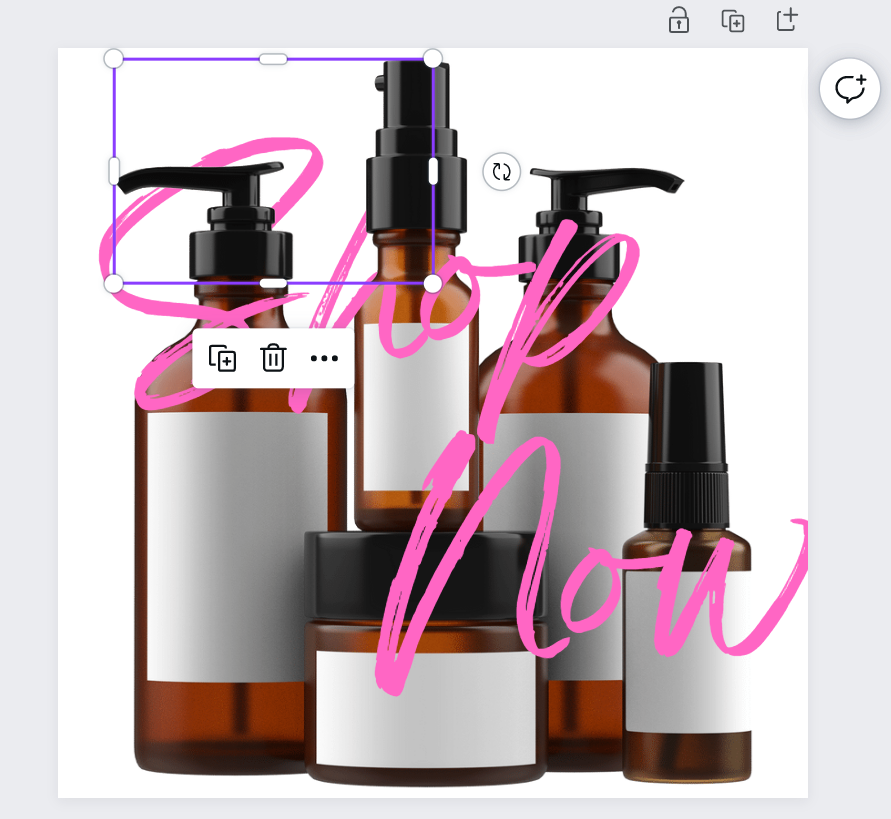
In the image above, you can see how we cropped the image on the top to make the text look wrapped around the image.
The text you see now is on top of the original image. And the wrapped part effect is created by the top cropped image.
You can also use multiple layers of the image to make the text look wrapped around the image. The final result looks like this.
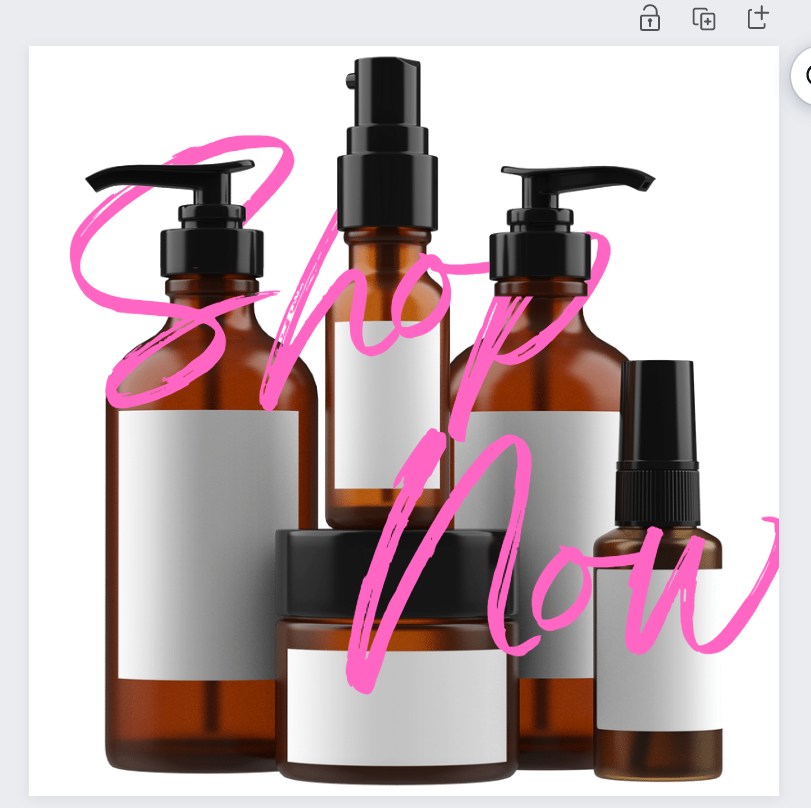
Looks elegant, right?
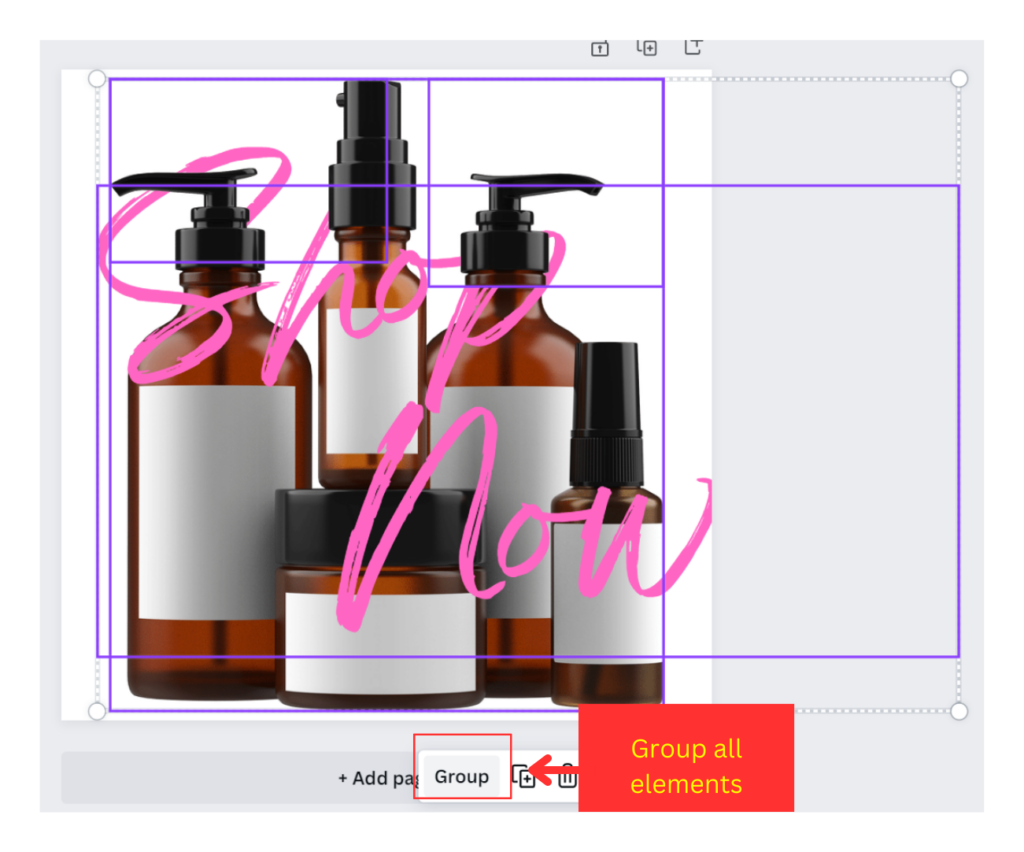
6. Group the elements
Finally, group all the elements (all images and the text) and group the selection to keep the alignment intact.
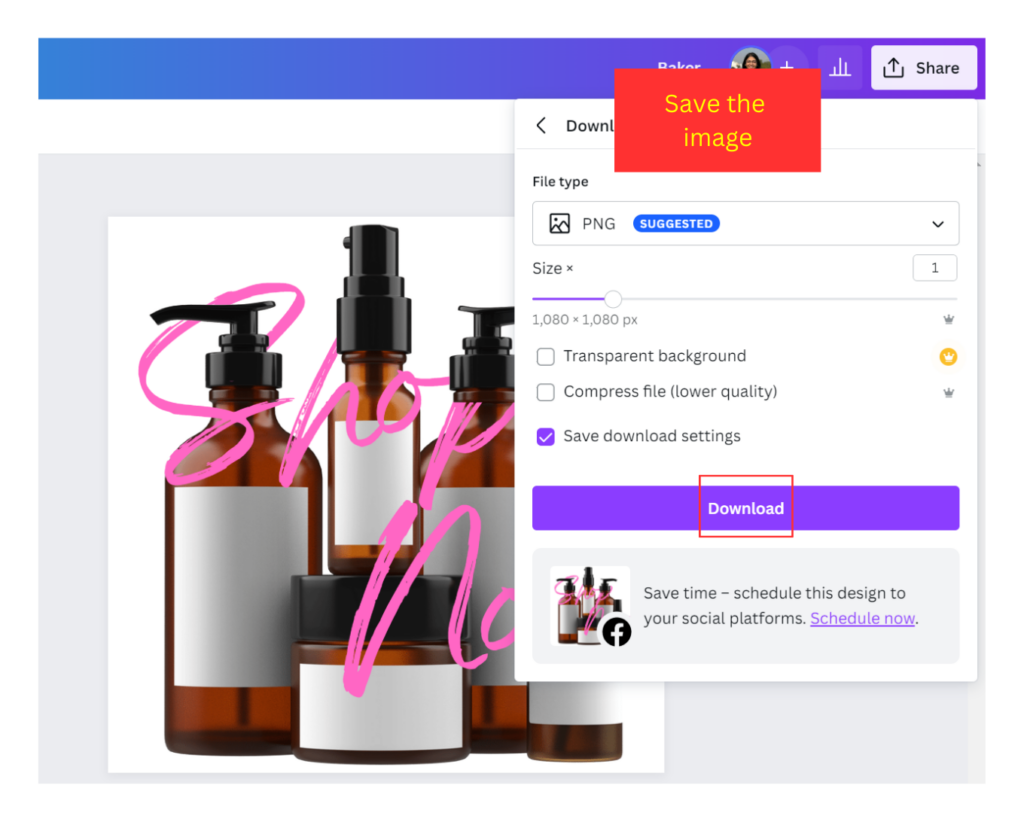
7. Save the image
To seal the deal, download the final image. To download the image, go to the “Share” button in the top right corner.
Select the download preference as “PNG” and download the file.
That’s it! Your text wrapped around the image design in Canva is ready. As easy as pie!
Conclusion
Canva offers a seamless and simple solution for wrapping text around images to create visually captivating designs effortlessly. Whether you’re designing brochures, infographics, magazines, or social media posts, Canva’s interface makes it easy to wrap text around images.
So, the next time you need to be creative, simply bring Canva into your life. Open Canva, unwrap the creative possibilities, and make a lasting impact with your beautifully wrapped text-around images.
Frequently Asked Questions
It is not possible to simultaneously wrap text around multiple images in Canva. The steps we discussed in this article can be used to wrap text around specific photos, though.
Yes, the wrapped text can be edited in Canva. Changes to the font, size, color, or content can be made by simply clicking the text element. The wrapping style will remain the same if you don’t change the image’s location or size.
There are several uses for wrapping text around images in different design situations. Here are a few instances of how these designs might be applied:
Brochures and flyers: The effect is useful for creating appealing layouts in brochures and flyers. It seamlessly blends text and graphics, enhancing the design’s interest and educational value.
Magazines: Text wrapping is frequently utilized in magazine layouts to produce engaging pages.
Product packaging: Product package designs can make use of text that is wrapped around photographs. It lets you display product photographs while giving necessary details and explanations, creating an appealing and educational bundle.
Social media graphics: Social media graphics, like posts or ads on Instagram, Facebook, or Pinterest, frequently have text enclosing photos. It’s a perfect effect to create visually appealing designs for these platforms.
Infographics: Text wrapping helps create aesthetically beautiful and educational infographics.
Also read: