Are you learning to use Figma? Do you wonder if Figma is a good design tool?
The answer is yes. Figma has become popular for its user-friendly interface and versatility in the last few years.
With Figma, designing has become as simple as ABC!
You might be familiar with the tool and want to learn how to add tables in Figma. Fortunately, we have you covered. We’ve created a step-by-step tutorial to create tables in Figma in this article. You can create tables of various sizes and add text, images, or icons.
If you’re a beginner with Figma, read our Figma Tutorials.
What’s still holding you back? Relax and read the easy guide on the Figma table component that follows.
Also read: Figma v/s Figjam: The Difference
How to Create Tables in Figma
Figma has made design accessible to everyone. You can use Figma on multiple platforms and browsers without any difficulty.
With a basic understanding and some practice, Figma can become a tool you can always rely on.
Be it for organizing data, creating collaborations, or more, creating tables is effortless with the Figma table component.
Here’s how you create tables in Figma in 7 steps:
Step 1: Add text to the canvas in Figma

We begin with adding text to the Figma Canvas. Later we’ll convert this text element to a cell of the table.
From the toolbar, use the Text tool to write text on the Figma canvas. As we’re creating a table in this demo, let’s call the text ‘Cell’.

This is how your text will appear on the canvas.
Step 2: Add auto layout to the text element to the component
We need to use the Auto Layout property in Figma to convert the text into a table cell.
Auto Layout helps add frames and components in Figma. It’ll help you increase or reduce the cell size when you add text to it.
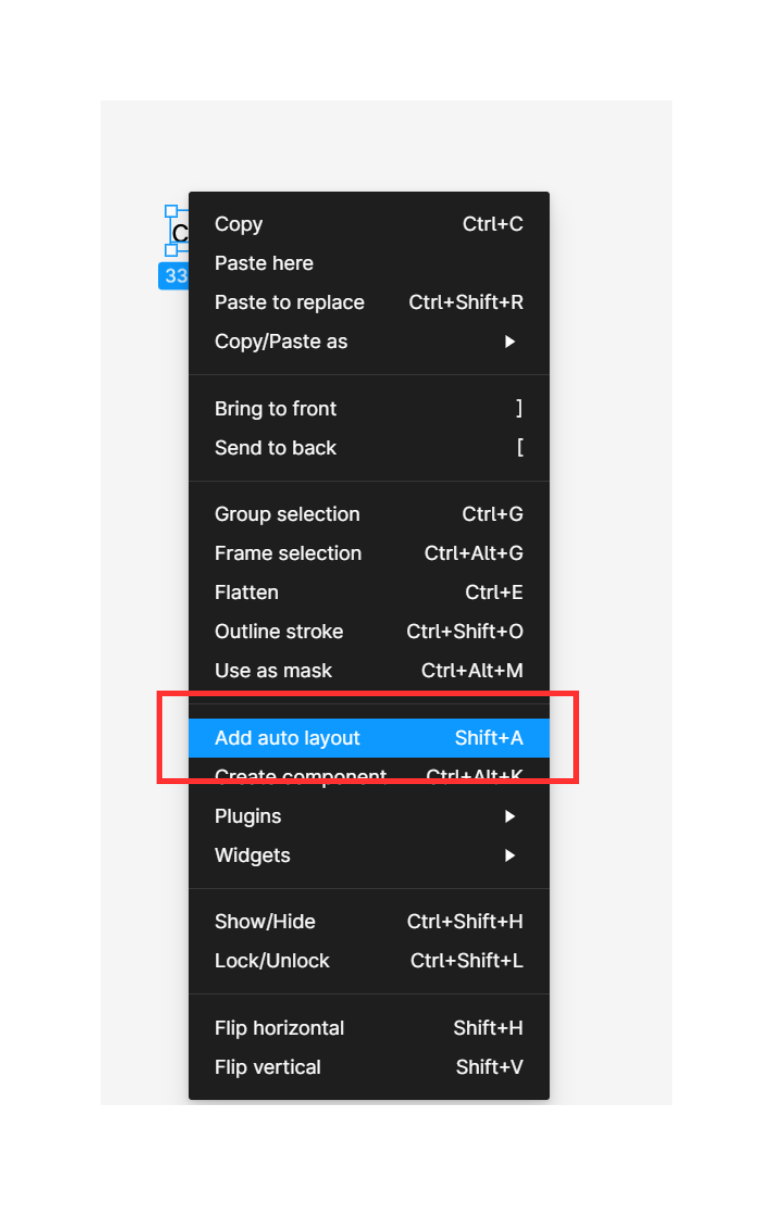
To add auto layout, right-click on the text and select Add auto layout.
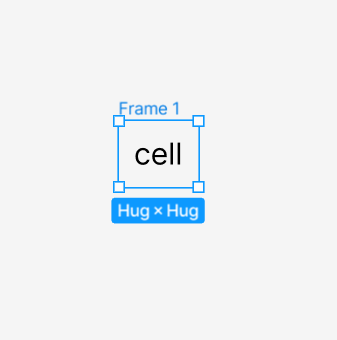
Your frame would look like this after using auto layout.
Cheers! This is the first cell of your table.
Step 3: Add a variant of the frame
To make a column, we need one header cell (which contains the column labels) and at least one body cell (which includes the main content).
To create another cell, we’ll use the Create Component property.
Components are what you can reuse in your designs. With components, you can create consistent designs throughout your project.
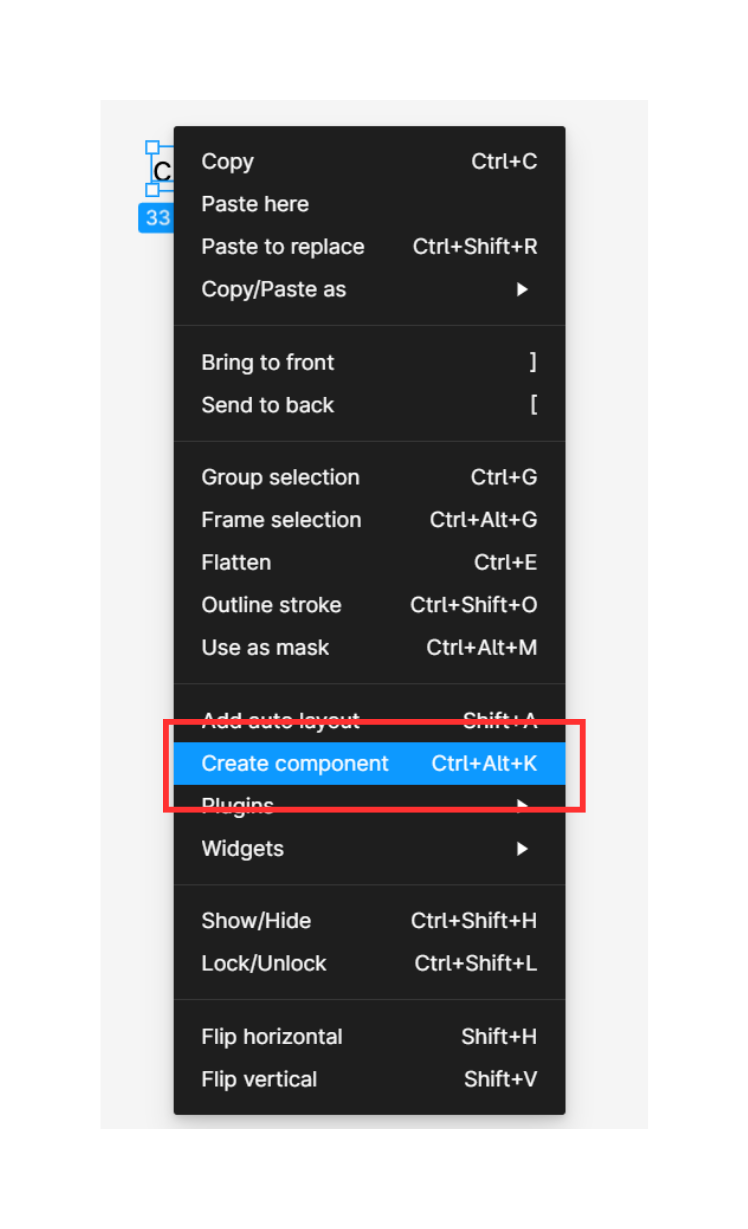
Select “Create component” by right-clicking on the frame.

This is how your frame will appear after using Create component. No change except for the color, right?
Wait, that’s not where you make the changes.
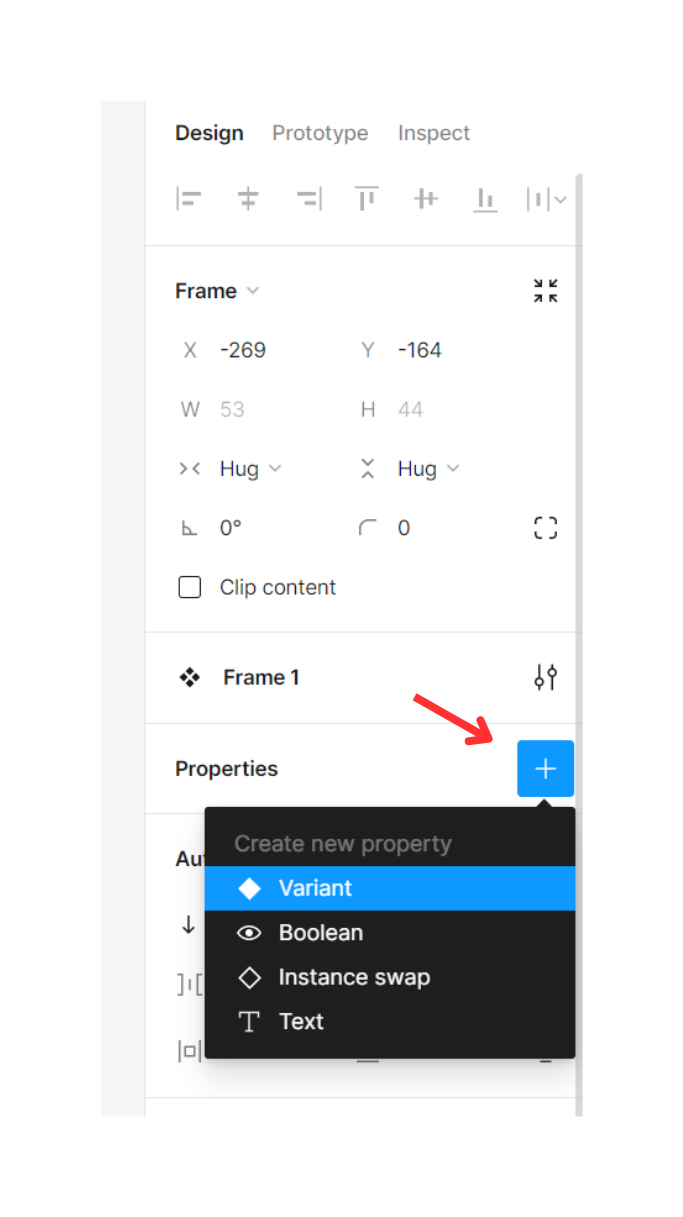
Click the plus “+” sign next to properties in the sidebar on the right and select the variant. It’ll create a variant of the frame on your canvas.
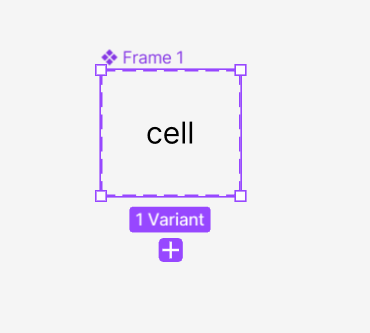
Click on the plus button that appears below the frame. And you’ll have your second cell ready.
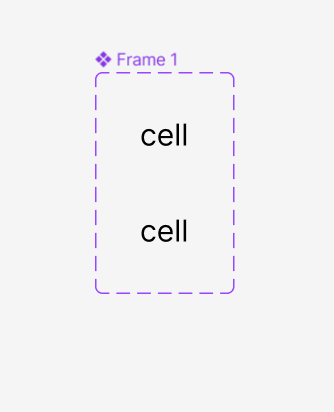
Rename the frame from “Frame 1” to “Cell”. The cell consists of one header and one body cell of your table.
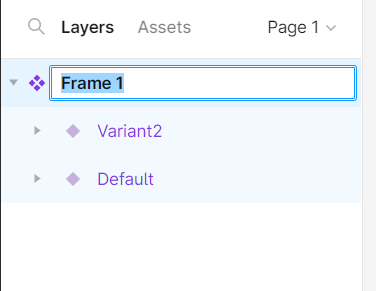
Step 4: Rename the two frames
Now, rename the two cells inside the frame to easily differentiate between them.
Rename the default cell as “Header”, as it’s the first cell of the column.
Rename the new variant as “Body”.
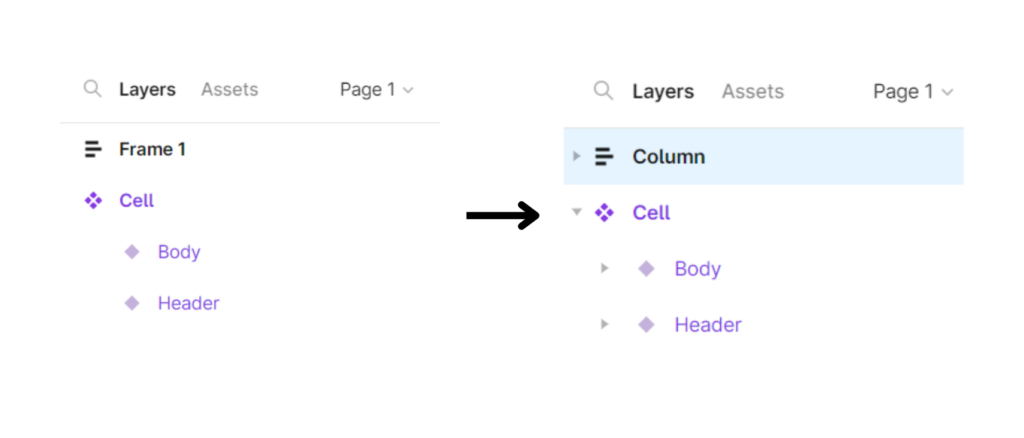
After renaming both cells, the changes will appear on the left sidebar under Layers.

Next, to have a visible difference between the two cells, change the colour of the header.

Use the Fill property on the right sidebar to change the cell’s color.
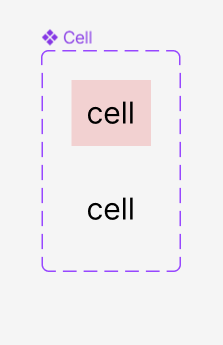
The two cells are easily differentiable now.
Step 5: Create a column using the two cells
After the initial prep work, it’s time to create the exact column for the table.
Copy the header and paste it twice on the artboard in Figma. To activate the artboard click the plus ‘+’ icon on the keyboard.
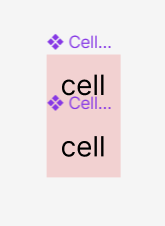
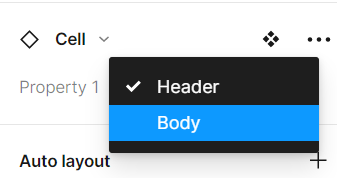
Change the property of the second cell to ‘Body’. For that, click on the cell properties on the right sidebar and change the property from Header to Body.
Then rename the entire selection from “Frame 1” to “Column”.
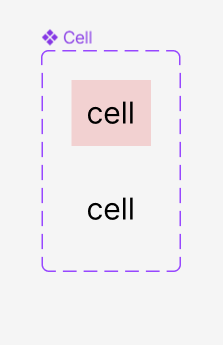
You’ll have a column with one entry value and a header.
Duplicate the body cell to create a column with four entry values.

Hurray! Your first column of the table is ready.
Step 6: Duplicate the column to create a table
Now, it’s time to create the rows of the table.
Duplicate the column you just created to create a table with five columns and five rows.
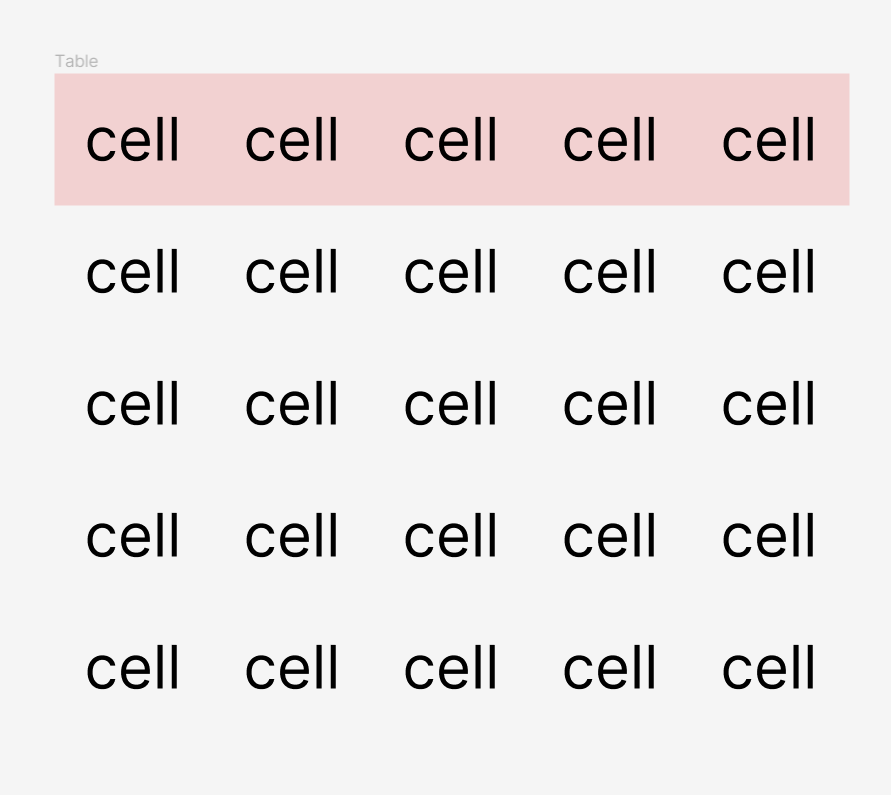
Finally, rename the entire table from “Column” to “Table”.
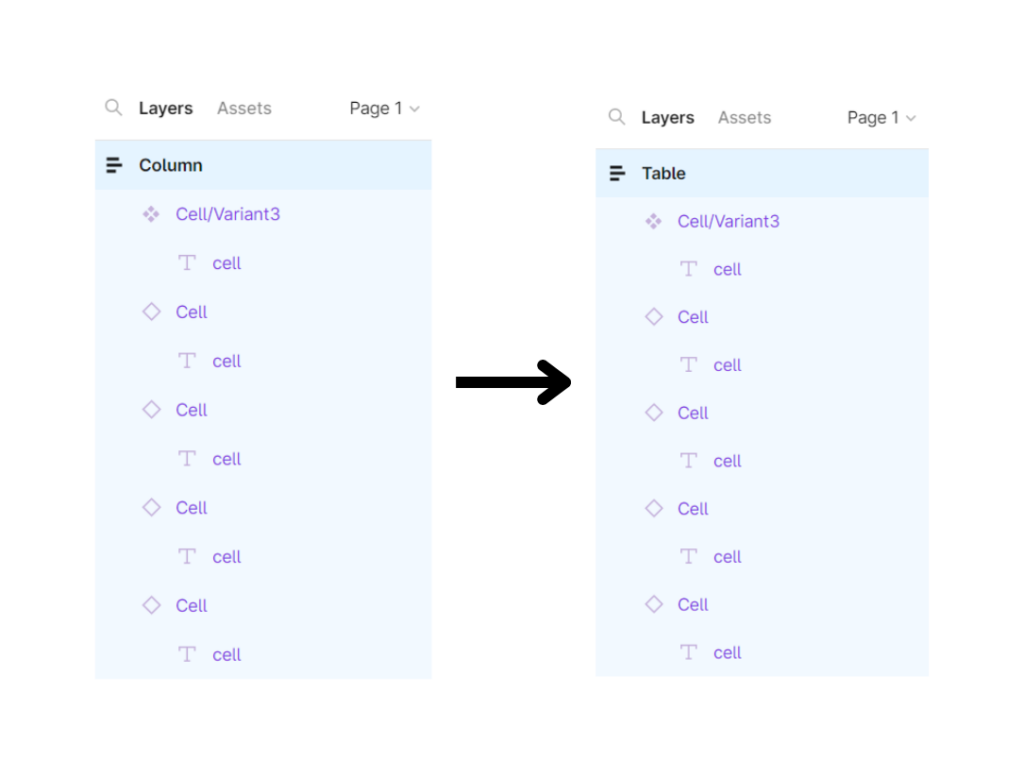
Pat yourself! You’ve created a table in Figma.
Step 7: Add values to the table
But what good is a table without values? Add the values you want to your table to give it the final touch.
Here’s a demo table we created.
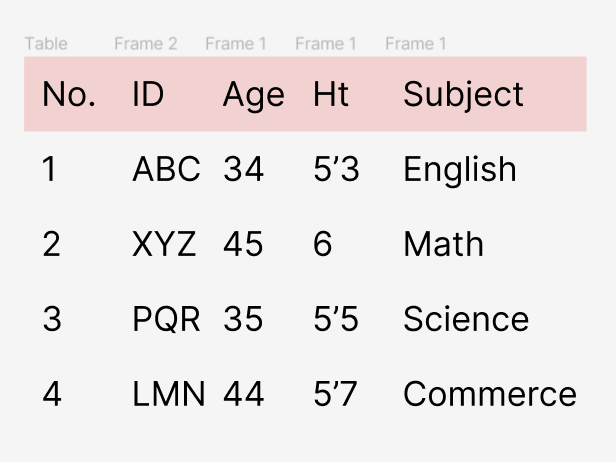
That’s how you add tables in Figma using the Figma table component.
Why use Figma for Designing?
Why is Figma becoming more and more popular as a design tool? There’s not just one reason for it.
- It can be used with several operating systems, including Windows, macOS, and web browsers. It is available to users anywhere.
- It’s famous for its versatility in a variety of design tasks like UI/UX design, graphic design, and prototyping.
- The drag-and-drop functionality of Figma’s user interface makes it simple to build designs.
- As Figma has a cloud-based collaboration, teams of multiple members can edit the designs in real-time. It makes completing the projects easy and saves a ton of time.
- Figma offers integrations with a range of tools. Jira, Trello, and Slack are just a few of the apps which can be integrated with Figma. It becomes easier for teams to manage their design projects and collaborate with other teams.
Conclusion
The next time make tables for organizational work or design, you now know how to add tables in Figma. Creating tables in Figma is quick and easy.
So, start using Figma to always have a powerful design tool at your disposal every time you work.
How to Add Tables in Figma: Frequently Asked Questions
To customize the appearance of a table in Figma, select the table and go to the “Properties” panel. You can adjust the table’s border, background color, font size, and other settings from there.
Yes, you can add interactive elements to a Figma table, such as links or buttons. To do this, select the element to which you want to add interactivity and go to the “Prototype” panel. From there, you can specify the action you want to occur when the element is clicked.
To share a Figma table with your team, go to the “Share” menu and select “Share Prototype”. From there, you can specify the team members you want to share the table with and set their access permissions.
Also read:
