
If you’re tired of sharp edges and boxy designs, it’s time to give your creations a soft touch with rounded corners. Whether you’re a beginner or a seasoned designer, Figma offers a quick and easy way to round corners on any shape.
Creating modern user interfaces requires rounded corners. It is especially useful when you want to create buttons. A round corner adds simplicity and flatness to an object. You may find it difficult to round corners if this is your first time using Figma.
In this guide, we’ll show you how to take your designs from harsh and angular to smooth and polished with just a few simple steps. So, grab your favorite shape, and let’s get started on creating some sleek and stylish designs!
The Ultimate Figma UI kit & Design System

Untitled UI is the largest Figma UI kit and design system in the world. Kickstart any project, save thousands of hours, and level up as a designer.
See More: Blobs in Figma
Rounded Corners in Figma
There are two methods in Figma to round corners. The end result will be the same
Method One – Setting Corner Radius
In this method, we can modify the radius of each corner or multiple corners at the same time.
With this method, we get accurate rounded corners. We can independently control the roundness of each corner.
Step 1: Open the existing Figma file or Create a new Figma file.
Step 2: Create a shape that can be a button, square, or anything like that.

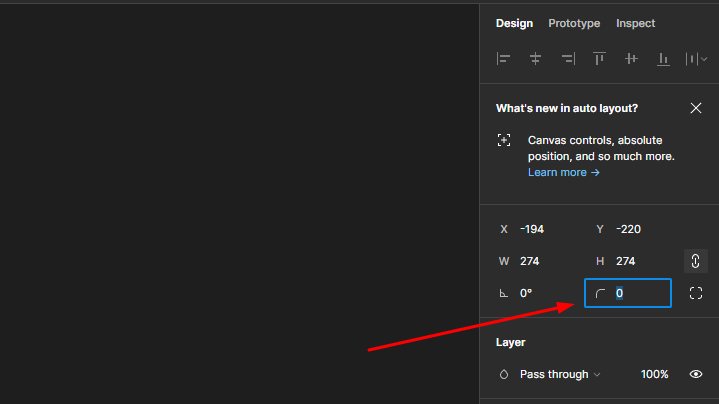
Step 3: Go to the Properties panel, find the radius setting, and change it as you like. You can see a column with a corner icon. Note that when we manually set a radius, it affects all corners.

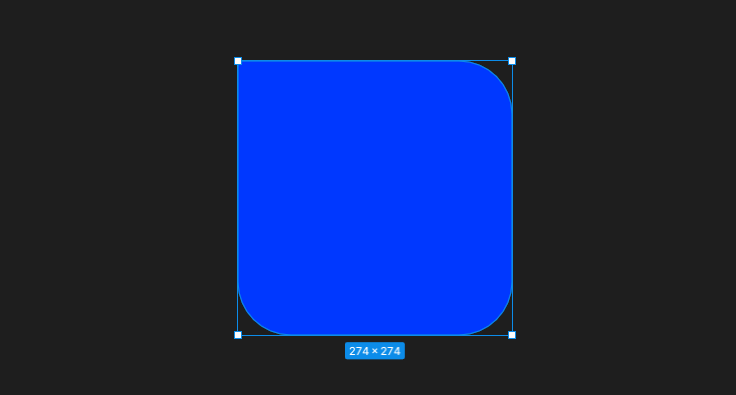
Step 4: If you want to round a specific corner, then click on the “Independent corners” button, which you can see on the right side of the corner icon. Now you’ll be able to see 4 columns for 4 corners. Adjust them as you like.

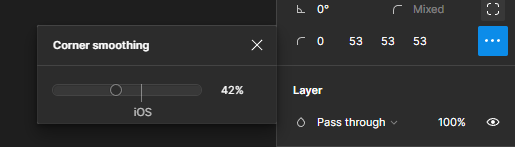
Extra Tip: Enable “Corner Smoothening” by clicking the 3 dots. In iOS, these smoothened rounded corners look smoother than the normal rounded corner.
Method Two: In the Canvas
This method is simpler than the first.
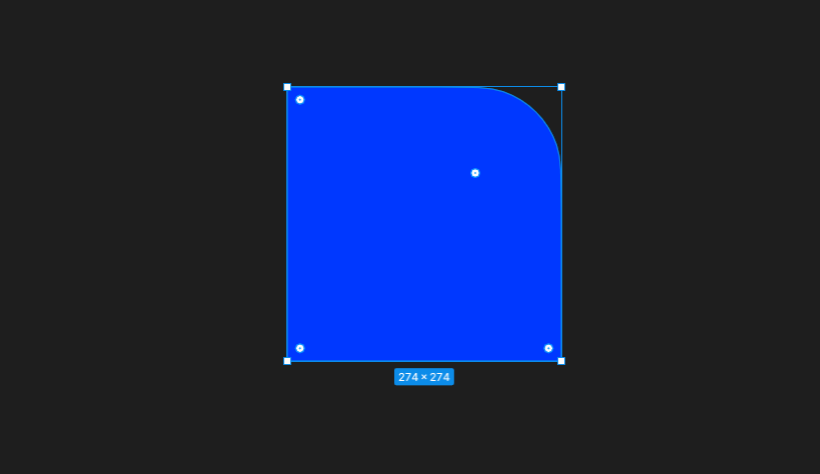
All you have to do is to select the shape and click and drag one of those dots. When you select a shape in Figma, you can see a dot in each corner. By dragging them we can control the roundness of corners.
Photoshop and Illustrator have the same property to round or smoothen the corners. Which is a very quick and easy way to do the job.
There you have it – a simple yet powerful technique to give your designs a touch of elegance and sophistication. Rounded corners can make a world of difference in the overall feel and aesthetic of your designs.
With Figma, it’s a breeze to achieve this effect and bring your creations to life. So why settle for boxy and sharp when you can add a touch of softness to your designs with rounded corners?
Now, go forth and experiment with different shapes and styles to take your designs to the next level!
How To Round Certain Corners In Figma
Go to the properties panel, click on the Corner Radius icon and Select the ‘Independent Corner’ icon. From there you can manually set the radius of independent corners.
If you’re new to Figma, you should check out our Figma tutorial section. We included simple tips and tricks in each tutorial.
You may also like: