Design is a crucial part of the digital world. There was a time when people used to rely on traditional methods. However, things have changed with advanced technology. Now, you need a few minutes to craft a world-class design. Thanks to some top-notch online tools.
Well, there are both paid and free tools available on the internet. The best part is there are some fantastic websites that let you create amazing projects for free. Here comes Canva, one of my favorite design tools.
From school presentations to social media banners, you can design everything on one website. The best thing I love about this cool website is it has tons of templates, features, and fonts. In fact, you can use different templates for different projects.
The free version has so many features that most newbie and pro designers love. If you know the right tricks, you can craft some top-class projects just by using the free templates and features. If you are a professional designer, you can also go for the paid version.
In this article, I will share how to stretch, slant, and curve text in Canva. I will explain these three methods separately. So, make sure you read everything attentively for a better understanding. Let’s get started.
Related: How to Save a Canva Design to Word Document
How to Stretch Text in Canva
Creating stretch text in Canva is very easy. Well, there’s no special feature for this. All you need is a bit of creativity and you will get a fantastic outcome. In the following guide, I will share an easy method to stretch text in Canva. Let’s find out:
Step 1: First, go to the official website of Canva. If you are a newbie, you have to register by giving the required details. After logging in, go to the home page and click on the ‘Presentations’ section. Here, you have to use a blank project.
Step 2: After choosing an option, a new canvas will be opened. Here, you have to add text for the project. So, go to the ‘Text’ section on the left sidebar of your screen and click on the first ‘Add a Heading’ section.
For example, I’m writing ‘Sample Text’ for this project. Make sure you write both words separately.
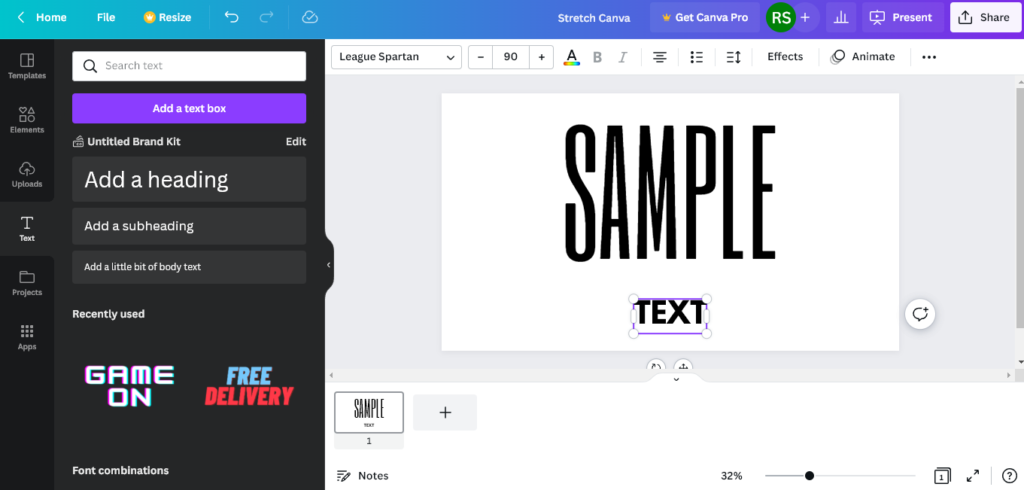
Step 3: Now, go to the text heading and add space between the ‘E’ and the ‘X’ letters. After doing this, adjust the heading with the first one.
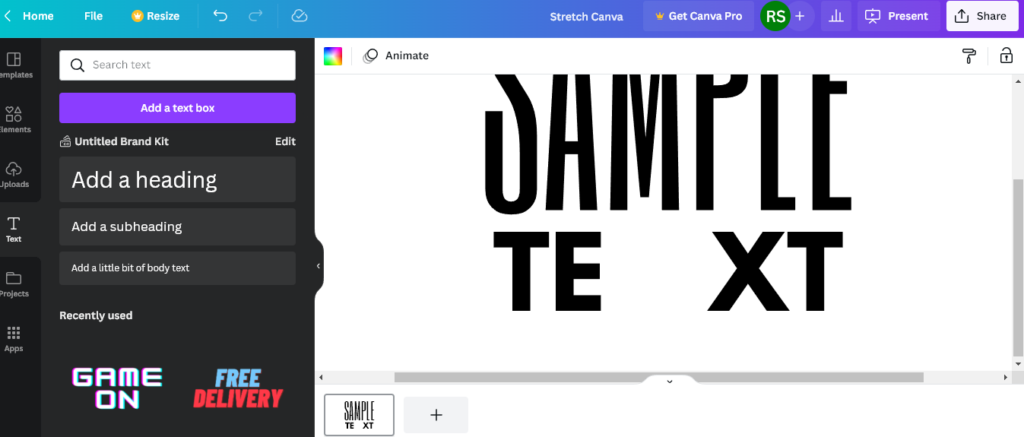
Step 4: Next, go to the ‘Elements’ option from the left sidebar on your screen. Here, you have to drag a squad element onto your canvas. Then, adjust the element with the ‘E’ letter.

Step 5: You have to copy two more customized elements and add them with the other two legs of the ‘E’ letter. To do this, select the element and click on the three dots. Now, scroll down and select the ‘Duplicate’ option.
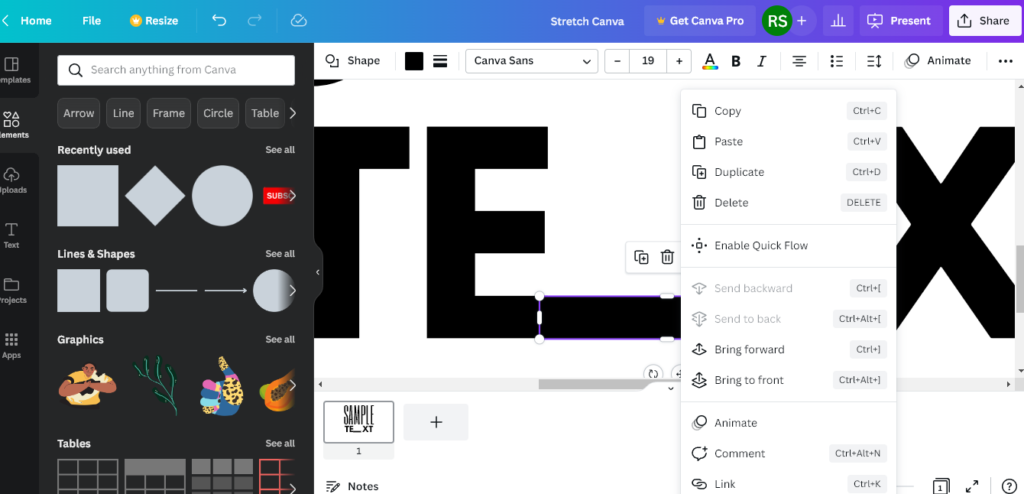
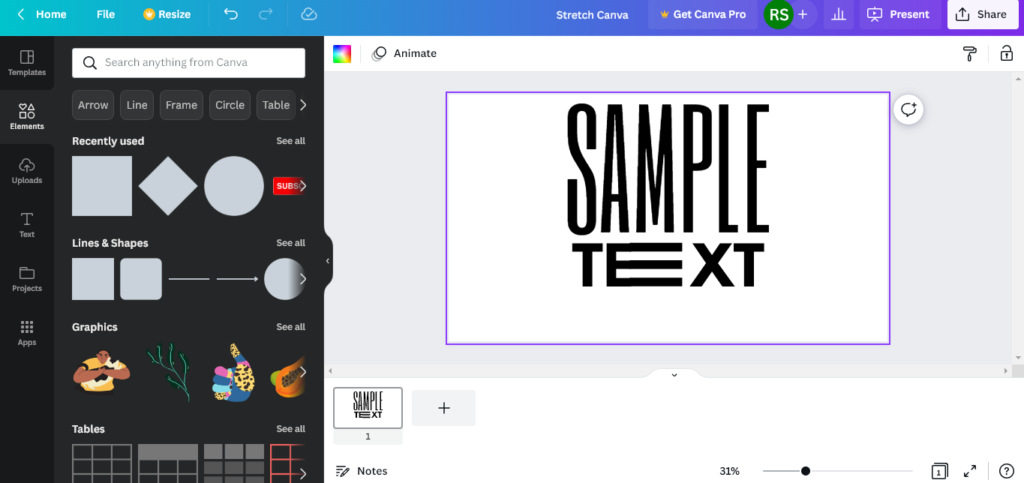
Step 5: After duplicating the element twice, adjust both of them with the remaining legs of the ‘E’ letter. Your text stretch design is ready.
How to Slant Text in Canva
If you want to slant a text in Canva, you have to follow some easy steps. Well, it takes less than five minutes to implement this method. Keep reading the following list to know more:
Step 1: First, go to the official website of Canva. Next, go to the ‘Presentations’ option and select a blank canvas for this project.
Step 2: Now, you have to add text to complete the project. Go to the ‘Text’ option on the left sidebar of your screen and choose ‘Add a heading’.
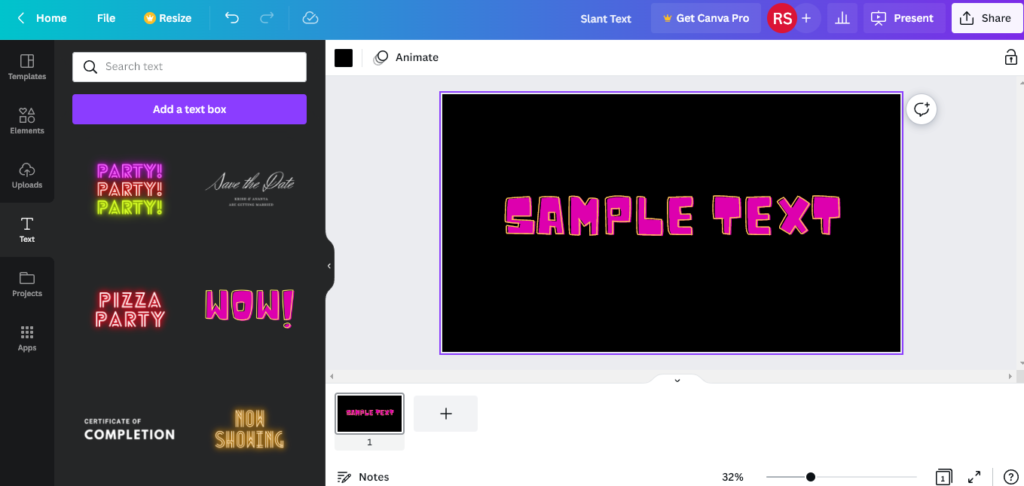
Alternatively, you can also drag a font design onto your canvas. I chose a pre-made design from Canva. I’m using ‘Sample Text’ for this project. Adjust the text as per requirement.
Step 3: After writing a text, you have to select it to complete the process. You will see the rotate icon. Click on the rotate icon and slant the text as per your requirement. The design is ready.

How to Curve Text in Canva
The curved text looks attractive. Many people use curved text for various projects like a logo, social media posts, or presentations. Well, if you use Canva, you can get an awesome outcome. In this case, you have to follow some simple steps. In the following list, I’m sharing the easiest way to curve text in Canva:
Step 1: Just like the previous two methods, you have to open the Canva website. Register for a new account if you are a beginner. After doing this, find the ‘Presentations’ option on the homepage and choose a blank canvas for your project.
Step 2: Next, add a text to start the project. Go to the ‘Text’ option on the left sidebar and select ‘Add a Heading’. Now, write a text as per your preference. For example, I’m writing ‘Sample Text’ for this project. You can also change the font design, size, and color accordingly.
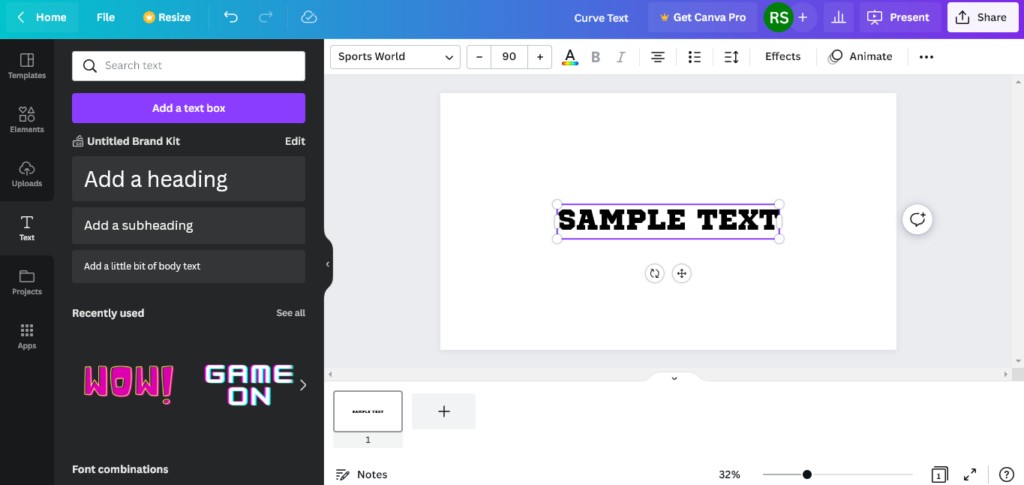
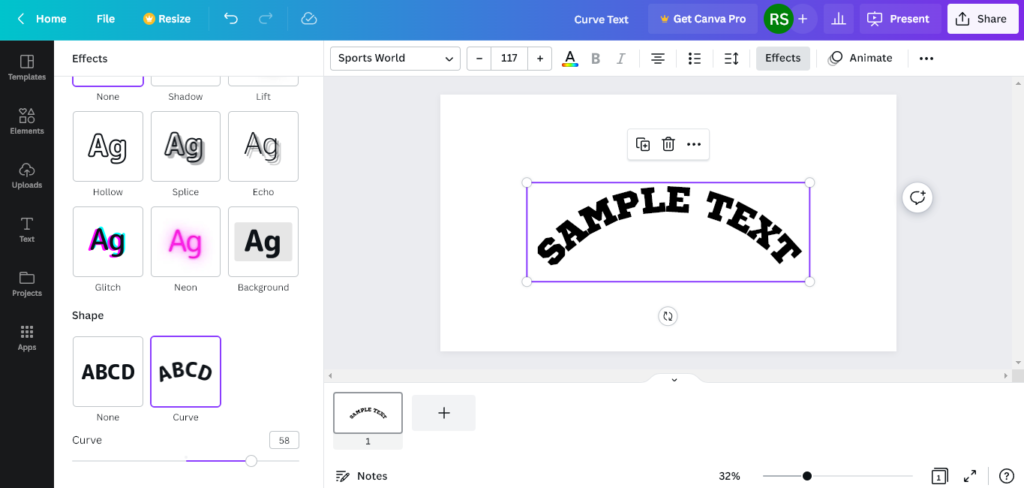
Step 3: Now, go to the ‘Effect’ option in the upper menu and click on it. A new menu will be opened on the left side of your screen. Here, scroll down and go to the ‘Shape’ section.
Select the ‘Curve’ option from here and see the effect. You can adjust the curved text as per your preference. Moreover, you can also use other Canva text effects for this project.
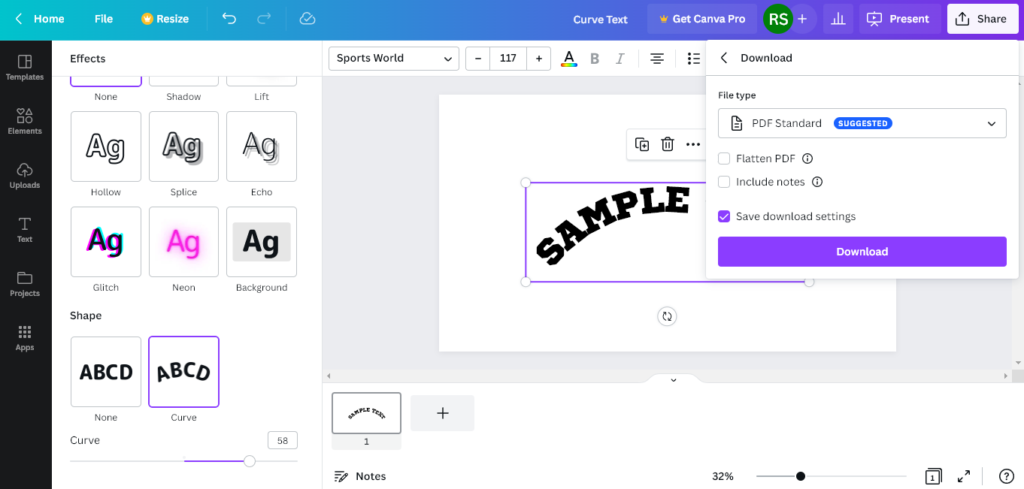
Step 4: Your curve text is ready. If you want to use this, Canva has a download option. To do this, go to the ‘Share’ option at the right top corner. Scroll down and select the ‘Download’ option. You can download the file in various formats.
Conclusion
As you can see, Canva is one of the most useful online tools for digital art. The best part is you can craft magic by using some cool features. I have shared how to stretch, slant, and curve text by using this advanced design software. You see, it doesn’t take a lot of time to implement these methods.
Related Posts: