
As a new digital artist, you must be facing several struggles while working with the software. You might be curating new drawings that surely look pretty in your head, but when you put them out there in the software, something might seem off. Well, don’t look for flaws in your drawing, it’s probably because of the malfunctioning software.
Pressure sensitivity is a feature that allows you to apply variable pressure on different regions of the drawing. This helps you give your drawing a desirable texture and shade.
The Krita pressure sensitivity is an amazing feature that can do wonders when coupled with a feature-rich graphics tablet powered by windows 11. A few accredited tablet brands include Wacom and Huion. A major reason why your art might not be pleasing enough to your eyes could be the malfunctioning of the pen pressure feature on Krita.
Krita pressure not working is a common problem encountered by several Krita users.
Similar Post: Import Photoshop Brushes to Krita
There might be multiple reasons why the pressure sensitivity on your Krita is malfunctioning. Not much of a geek to fix the problem yourself?
Well, I’ve got you covered, today we shall explore the reasons that might be causing the pen pressure feature to malfunction and troubleshoot the possible cause of the problem.
In this article we cover:
- Why is Krita’s Pressure Not Working Correctly?
- Check If Pressure Sensitivity Is Enabled
- Use A Brush That Allows You To Use Pen Pressure
Why is Krita’s Pressure Not Working Correctly?
If you’re a newbie and you’re stepping into the world of digital art, you might be new to pressure sensitivity. There’s a chance that the pressure sensitivity is working alright but you do not know how to exactly use it and how much pressure to apply.
I recommend you be patient and try multiple times. For newbies, it takes a while to get a hang of the Krita pressure sensitivity feature. Maybe after a few trials and errors, you’ll master how to use the pressure sensitivity to perfection.
Check If Pressure Sensitivity Is Enabled
The most obvious and common reason could be that the pressure sensitivity feature itself is turned off on your tablet. To check whether you’ve enabled pressure sensitivity, follow the steps given below.
Krita largely depends on the drivers and their capabilities. So before you start using pen pressure, ensure that all your windows drivers are updated to the latest version.
You can do so easily by heading to settings and checking for driver updates.
Step 1: Launch Krita on your windows 11 powered tablet
Firstly you need to launch Krita on your device. You can do so by simply clicking on the Krita icon on your home page.
Step 2: Configure Krita
Once you have launched Krita, from the top menu, you need to click on “settings”.
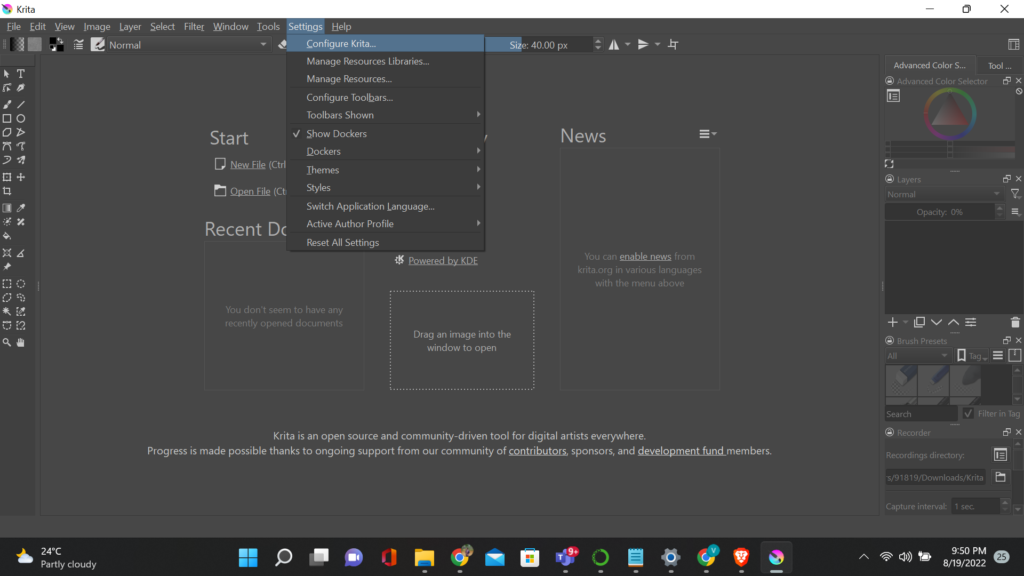
From settings, you need to select the “configure Krita” option. By doing so, the following window should open
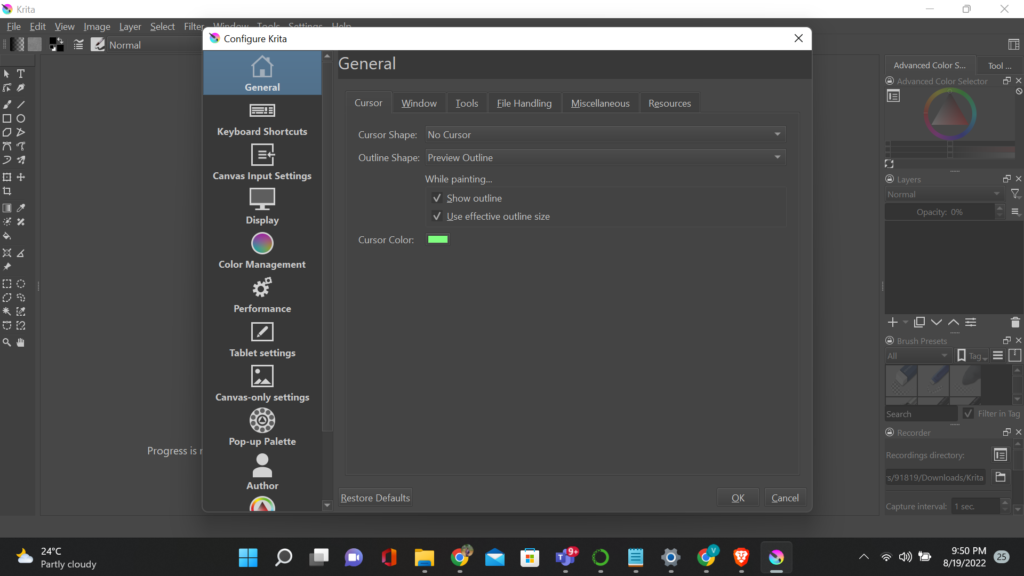
Step 3: Enable Windows ink

To enable pressure sensitivity, you need to click on “tablet settings” from the left pane. By default, “WinTab” would be selected, you need to select “Windows 8+ Pointer Input (Windows Ink)” and click on “OK”.
Step 4: Configure the toolbar
Once done, you need to configure the main toolbar. To do so, click on “settings” from the topmost menu. Now, from the drop-down menu, select “configure toolbars”. Once done, the window shown below will open. In toolbars, you need to select “mainToolBar”
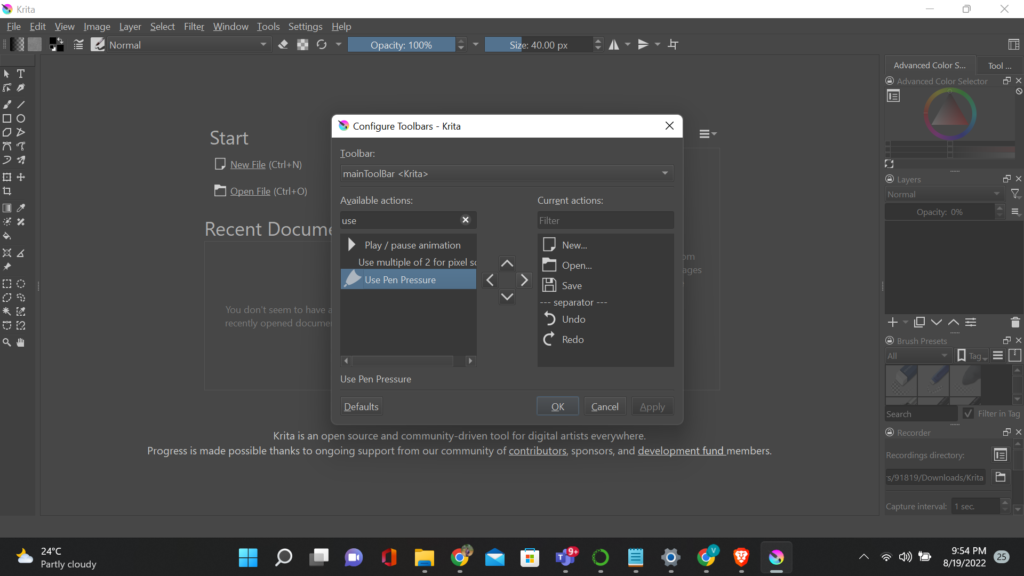
Step 5: Enable pen pressure
From the left-hand side menu, i.e. “available actions”, you need to scroll down and find “Use Pen Pressure”. Select it, and then use the right arrow key to move the action to the list of “current actions”. Once done, click on “OK”
Step 6: Ensure that the file toolbar is shown
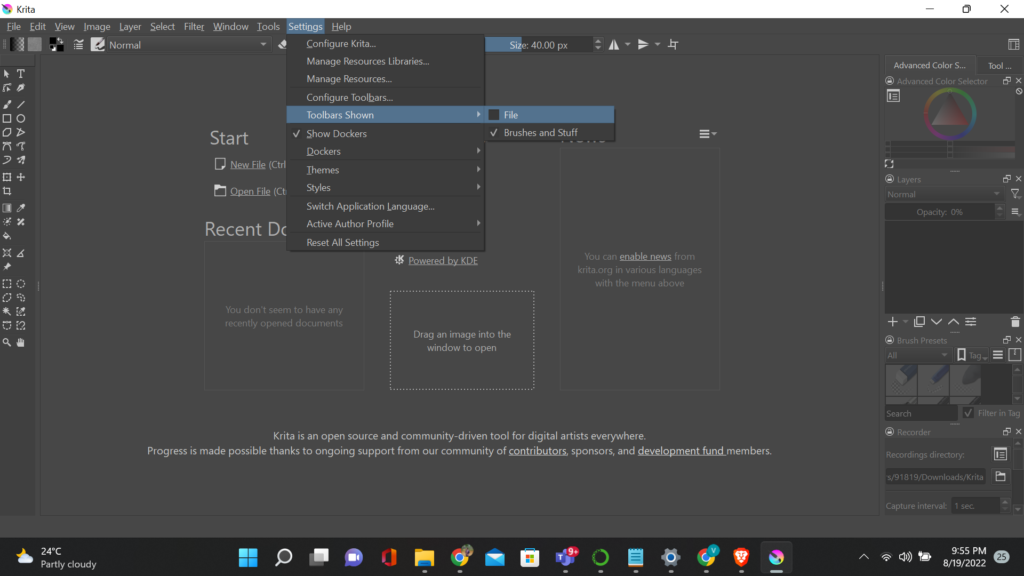
After you’ve done the steps listed above, you need to ensure that the file toolbar is displayed. You can easily do so by clicking on “settings” from the topmost menu. In the drop-down menu select, “toolbars shown” and check in the “file” check box.
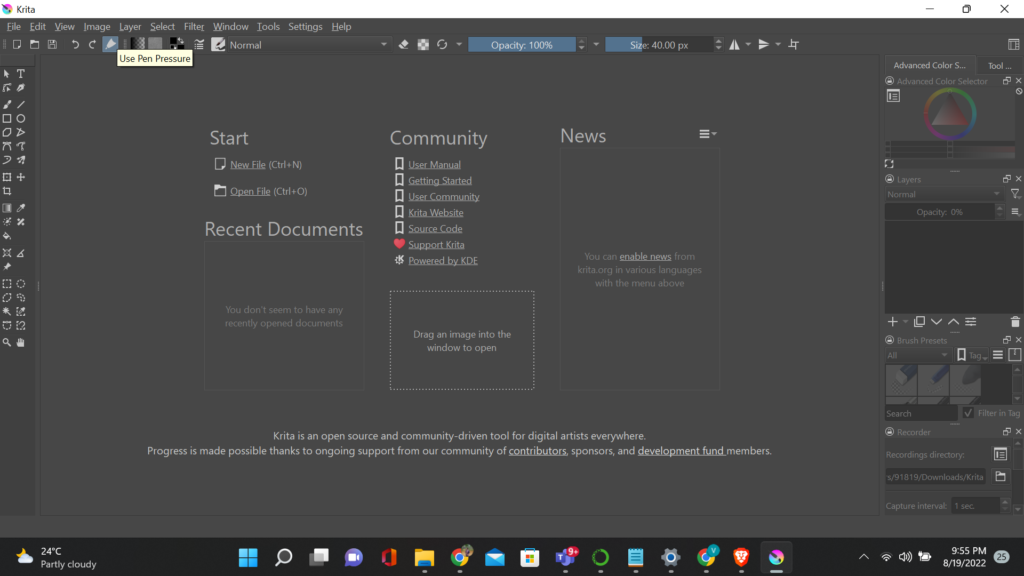
Step 7: Enable pen pressure
Now you can go ahead and make your drawing on your canvas. To use pen pressure just click on the “use pen pressure” icon located in the “files toolbar”. You can find the icon beside the “undo” and “redo” icons.
Use A Brush That Allows You To Use Pen Pressure
While drawing, ensure that you select a brush that is compatible with pen pressure. Using a non-compatible brush will not allow you to use pen pressure. A few examples of brushes that allow you to use pen pressure, include Basic-5 Size Opacity, and Basic-5 Size.
Once you’ve enabled Krita pressure sensitivity on your Wacom or Huion, the software should work smoothly and you can create breathtaking art!
Conclusion
Today, we’ve seen how you can seamlessly use pen pressure on Krita. Krita is a highly user-friendly open source software that has amazing features such as pen pressure.
These features help you add a masterful touch to your drawing. Pen pressure is one such feature that lets you tweak the texture, gradient, and luster of your drawing.
Enabling the pen pressure could sometimes be tricky, especially if you’re a neophyte in Krita. Hope the tutorial helped you enable pressure sensitivity and work with it smoothly on your Wacom, Huion, or windows 11 device.
More Krita Posts: