
Video content is an essential component of online marketing, advertising, and social media. However, creating high-quality videos often requires specialized software and technical skills, making the process challenging for many.
It’s where Figma comes in – a design tool enabling designers to quickly and easily create professional-looking videos. Figma offers a range of powerful video editing features, allowing users to export their designs as MP4 videos for use across various platforms.
By exporting your designs as MP4 videos, you can enhance your marketing, advertising, or social media presence with professional-looking videos that engage your audience.
We’ll walk you through the 5 simple steps necessary to export MP4 videos from Figma in this blog post. Whether you’re a content creator, social media manager, or marketer, this post will equip you with the knowledge and skills you need to make your videos stand out and captivate your viewers.
Check out our Figma guide if you’re new to the tool.
So let’s explore how you can export animated videos from Figma!
Also read: Difference between Figma and FigJam
How to Export Videos from Figma
You can export animated videos from Figma in a snap, and it’s a great way to make your content more engaging and visually appealing. And the best part? You don’t need to be a design pro to make it happen!
By the end of this guide, you’ll have all the knowledge and skills you need to create amazing videos and export MP4 videos from Figma that will make your online presence shine!
Step 1: Import images into frames on Figma Canvas
First of all, open a new design file in Figma. To export an animated video from Figma, we’ll need a few images to add to the video.
For this post, we’ve selected some demo images. You can choose the photos depending on what you want to include in the video.
First, add rectangular frames on the canvas to add the images on Figma.
Then choose “Place image” from the File option in the menu bar.
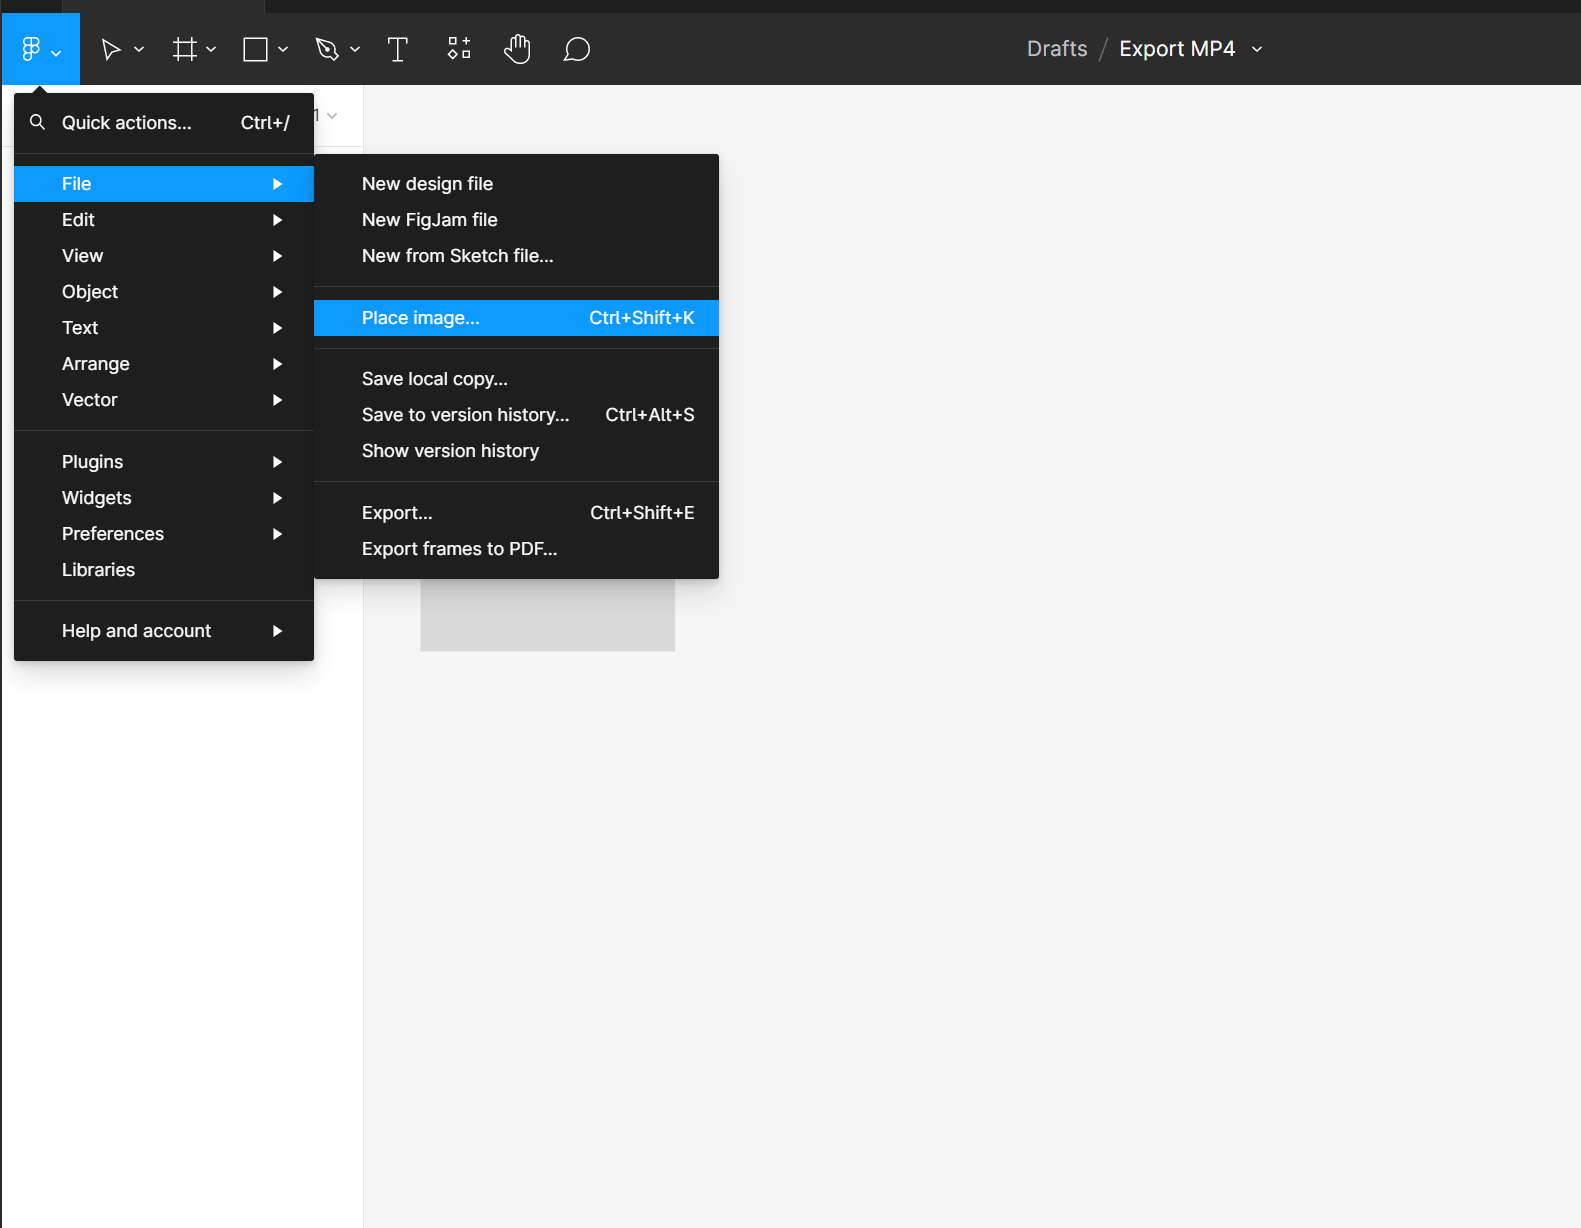
You can select a photo from your device and insert it within the frame.
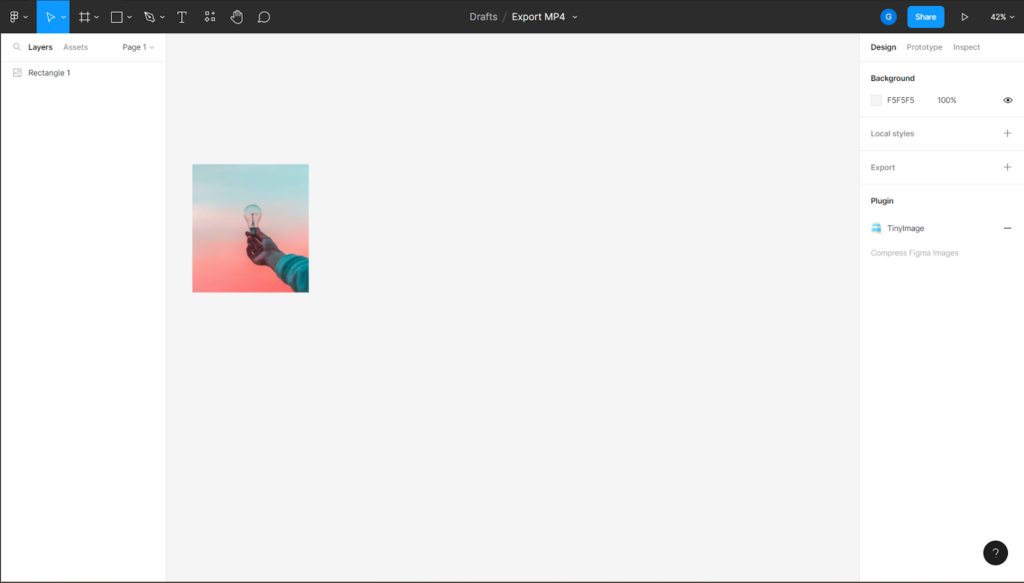
Similarly, insert all images you want on the Figma canvas.
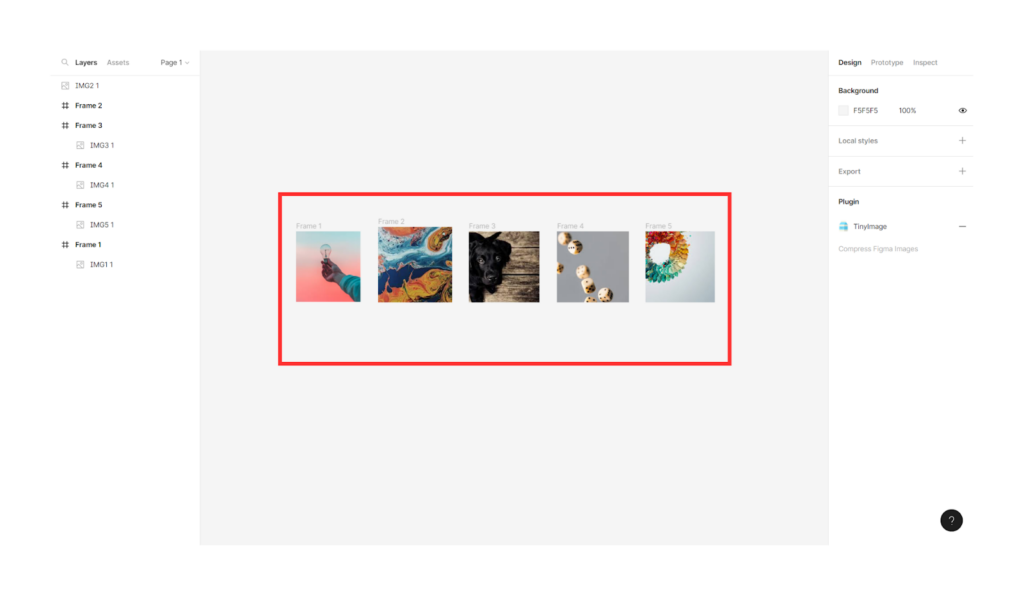
The initial prep for your video is done, and let’s move on to the next steps.
Step 2: Save and run the TinyImage Compressor Plugin
To convert the images into an MP4 video, you need to use a plugin. The TinyImage compressor plugin is available for free on Figma.
Click Plugins under “Resources” in the menu bar.
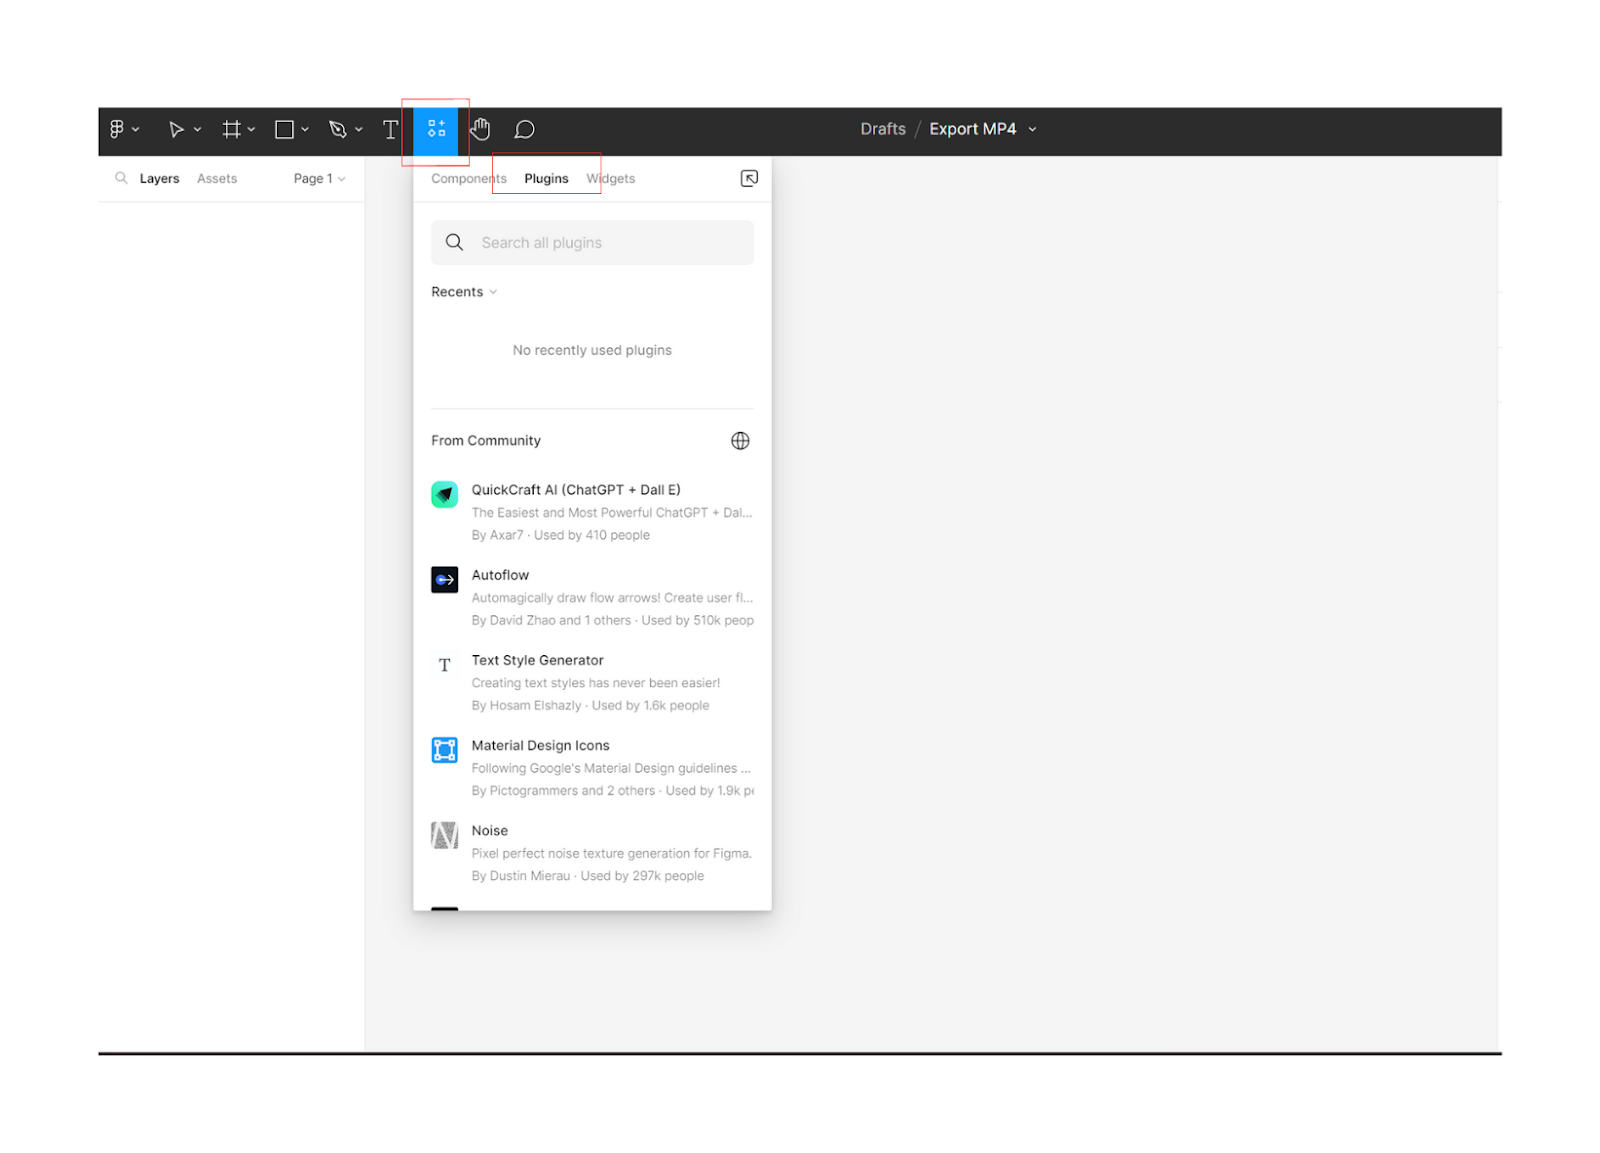
Type “TinyImage compressor” in the search box.
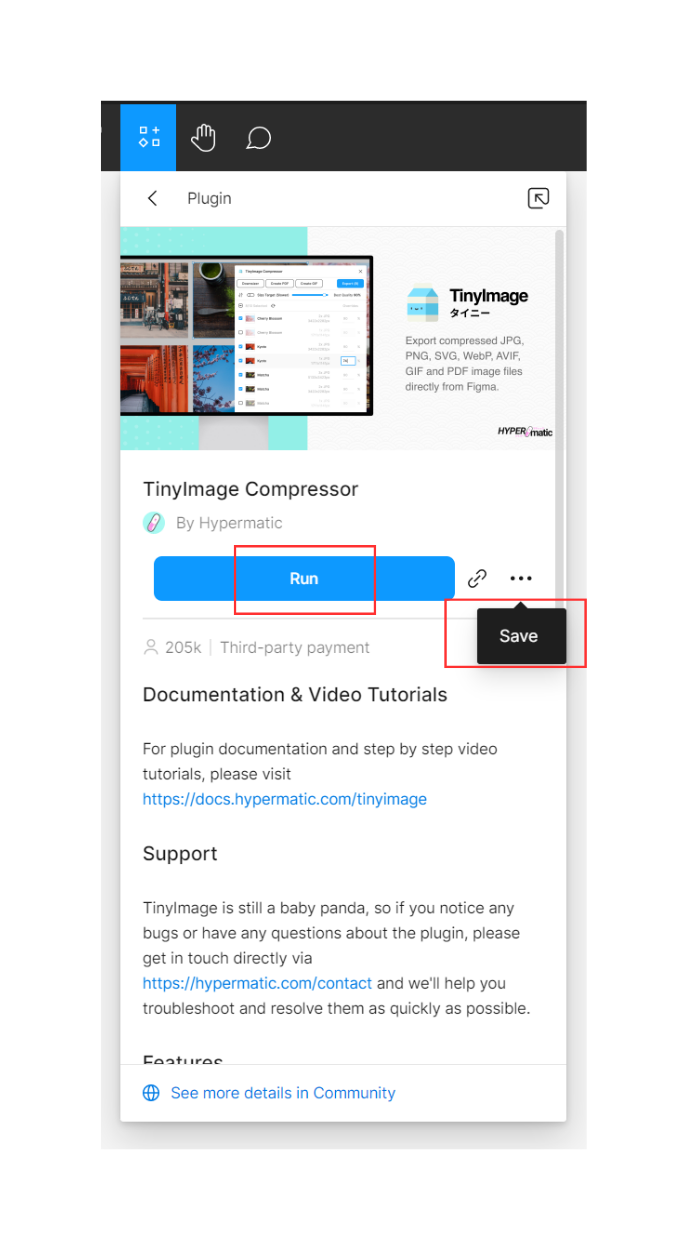
Select “Run” from the menu options or “Save the plugin” from the triple dots.
After you’ve saved the plugin, you can access it by right-clicking on the Figma canvas. Right-click the canvas and choose “Plugins.” “TinyImage compressor” will be displayed in the list.
Once, you open (run) the plugin, a dialog box will appear.
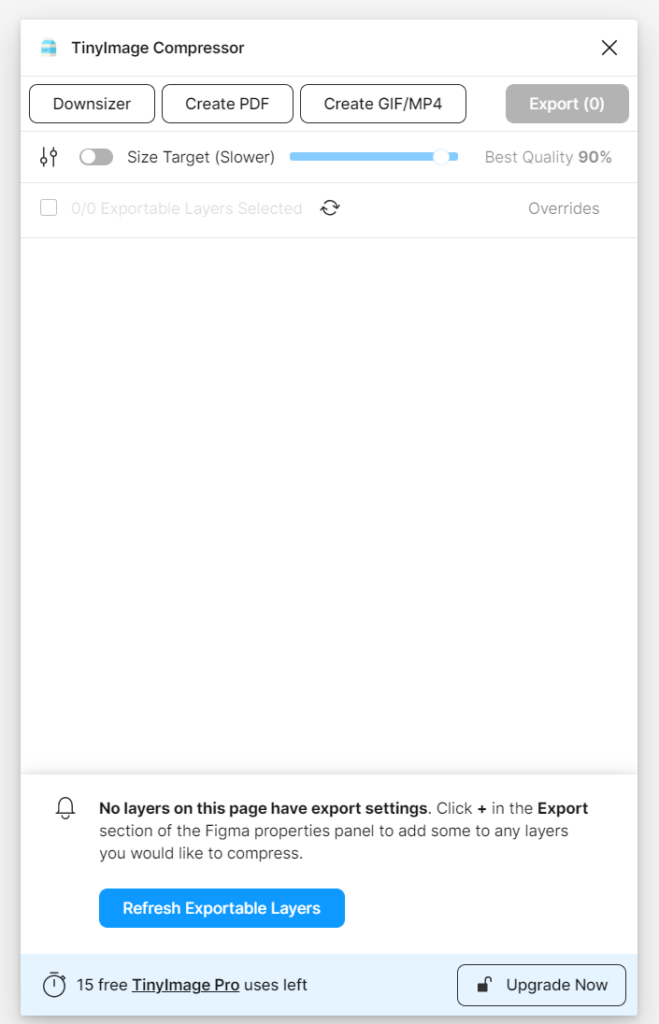
Step 3: Select all the frames and click on Create a GIF in TinyImage Plugin
Now, select all the image frames on the Figma canvas and run the TinyImage compressor plugin. Click on the “Create GIF/MP4” button.

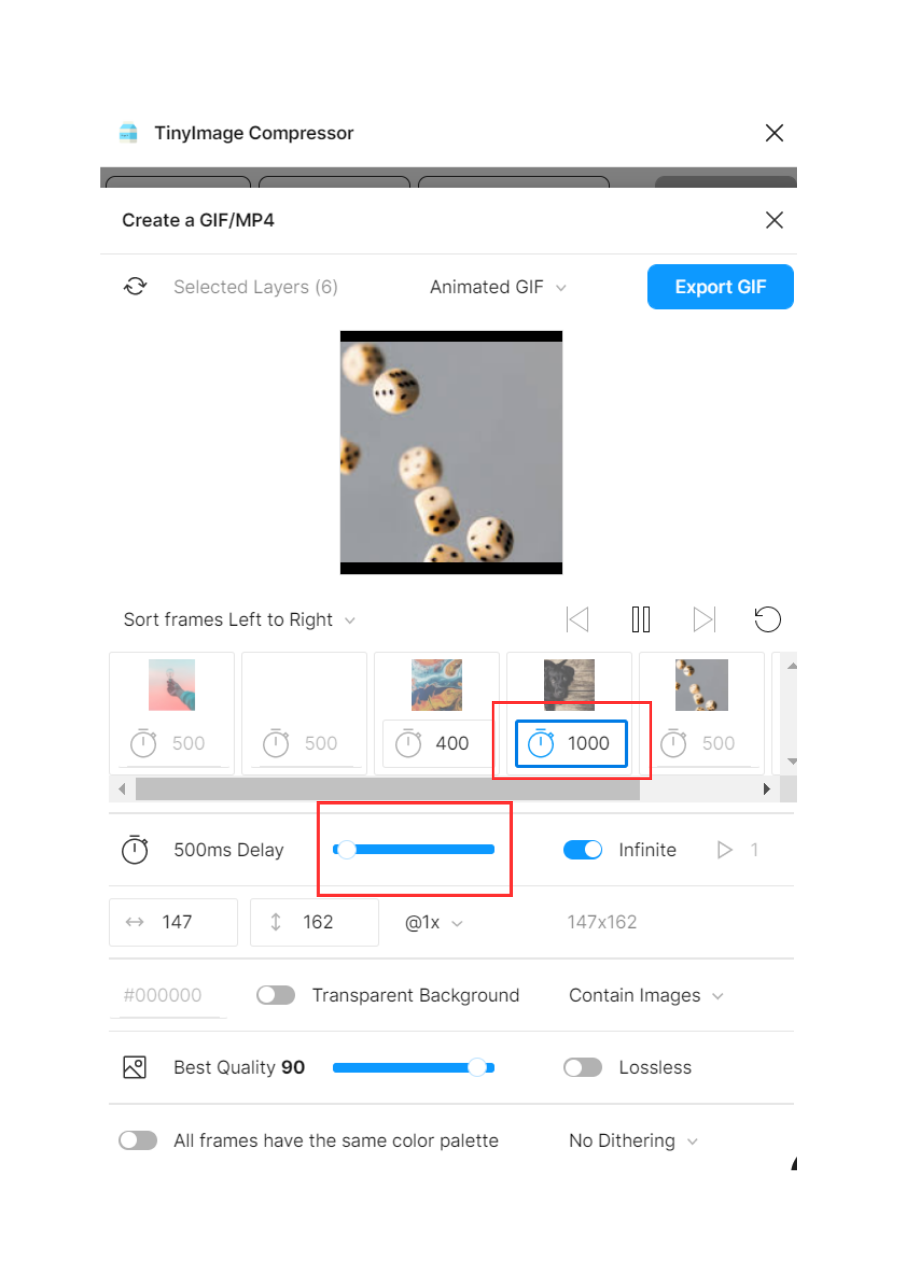
Step 4: Change the frame settings
You’ll get multiple video editing settings within the plugin.
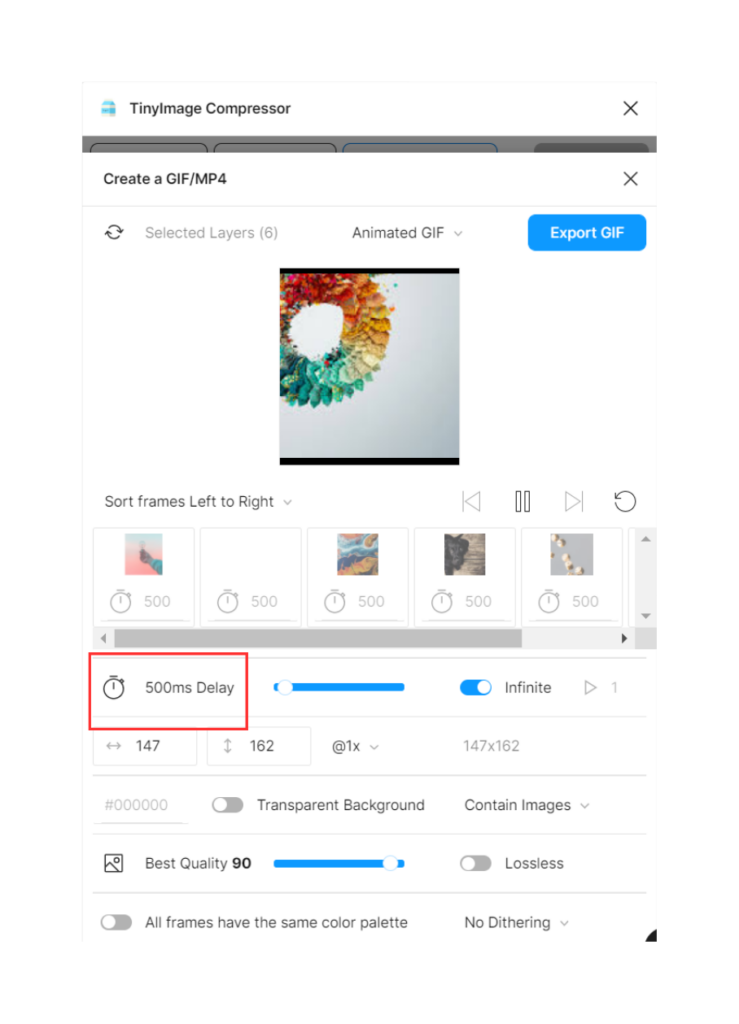
You can choose to change the time delay for each image. By default, the time delay is 500ms. You can change it manually by changing the value below each slide or scrolling the bar beside the time.
Another setting feature important for good editing is the “Image Fits.” The feature has two settings: Contain images and Cover images.
When you choose “contain images,” the images will fit their original size inside the frame. But with “Cover image,” fits the images perfectly inside the frame to cover it entirely.
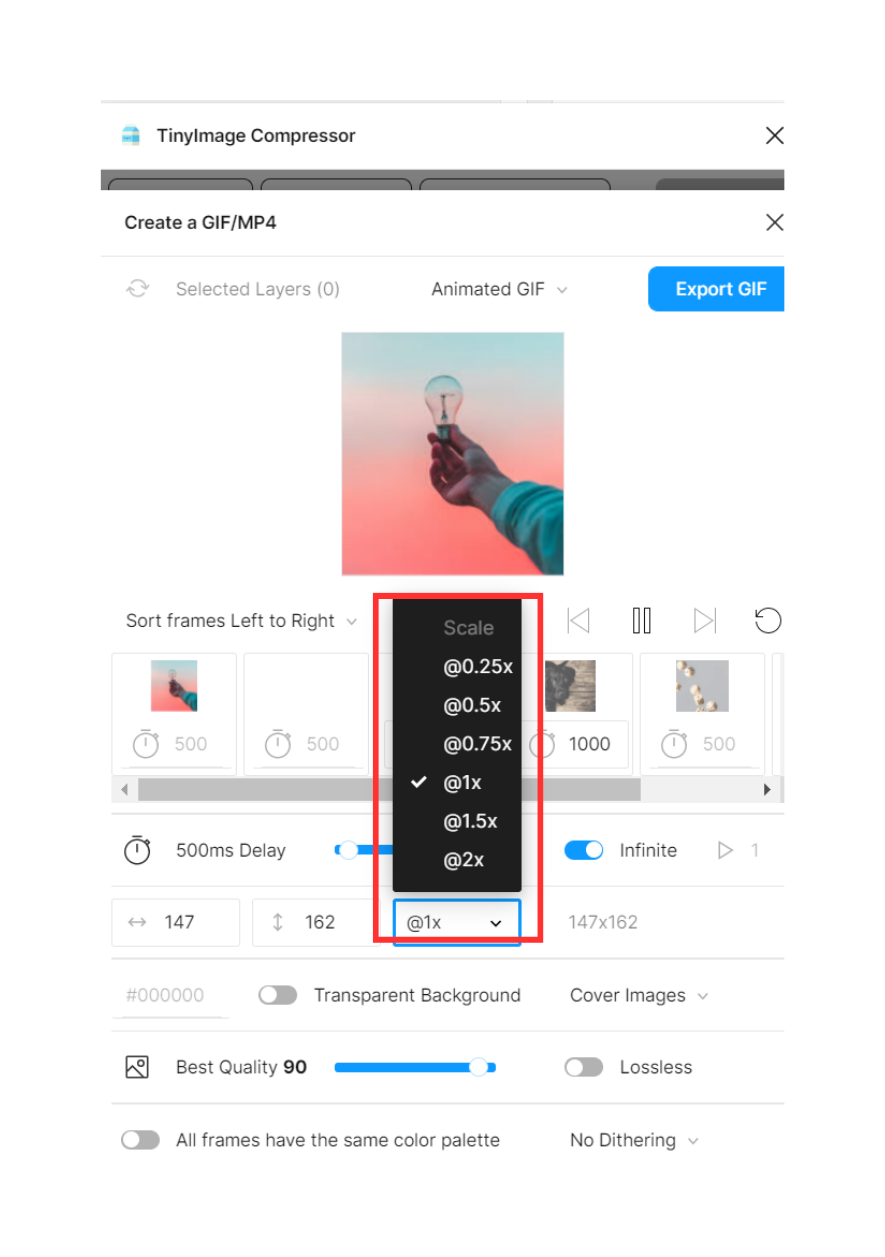
The next feature is changing the resolution scale of the video. You can increase or decrease the resolution by increasing or decreasing the scale.
For this blog, we’ve kept the scale at 1.
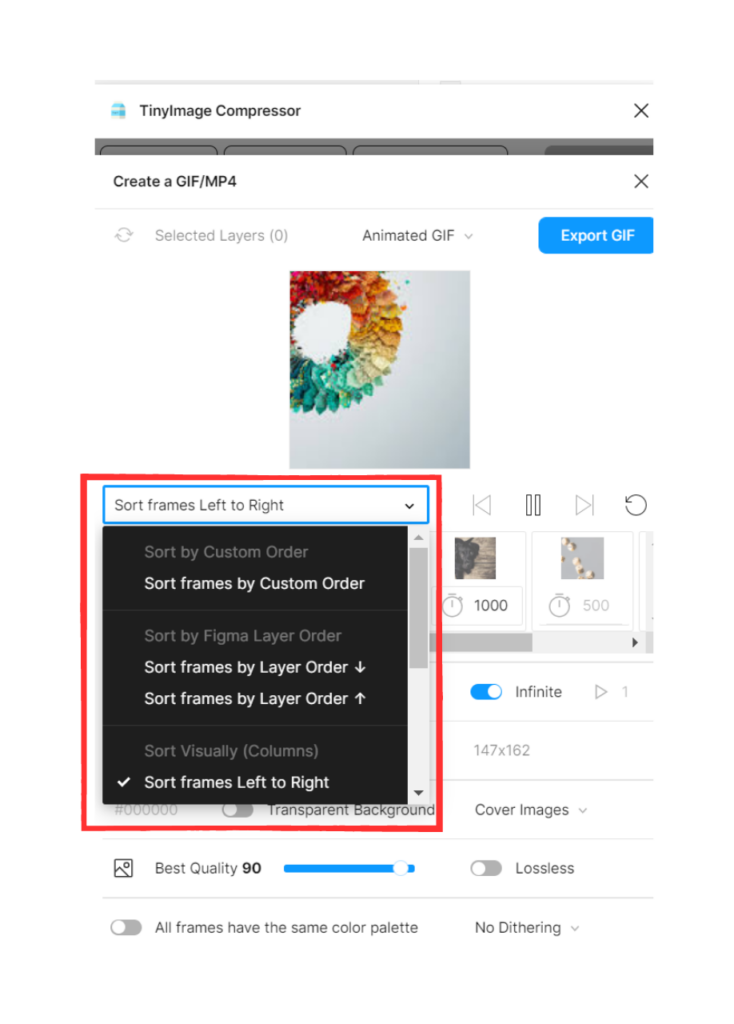
One final important settings feature is the sorting of frames. By default, the frames are sorted from left to right. But you can rearrange the order as per your choice.
Once you’ve completed setting up the video, it’s now time to export the MP4 video from Figma.
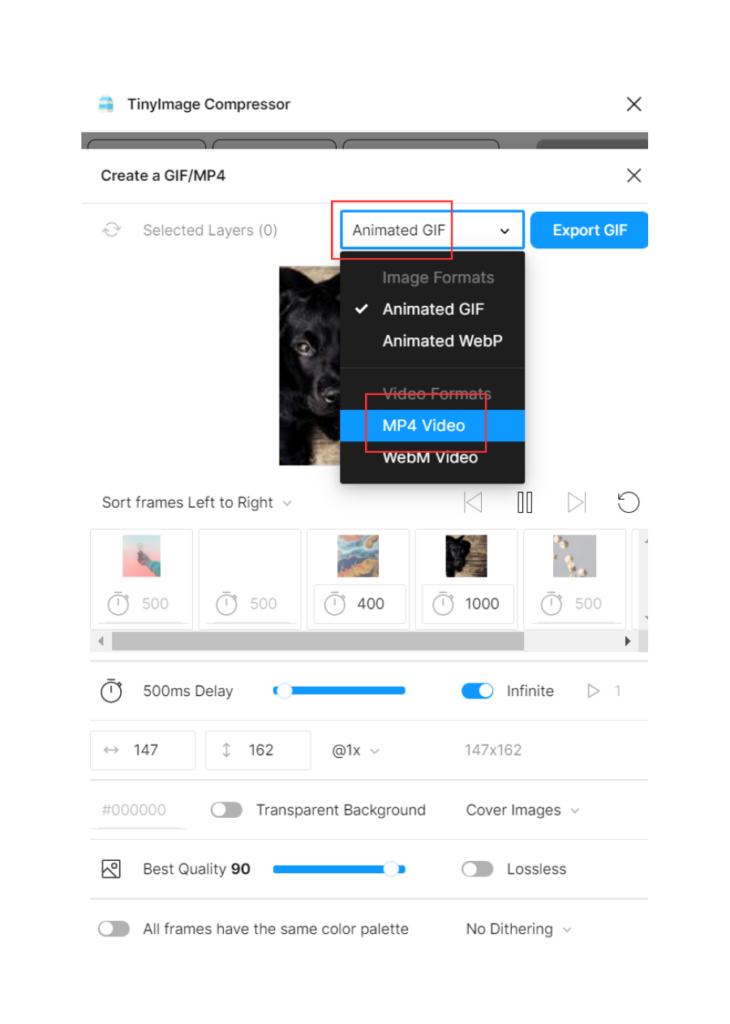
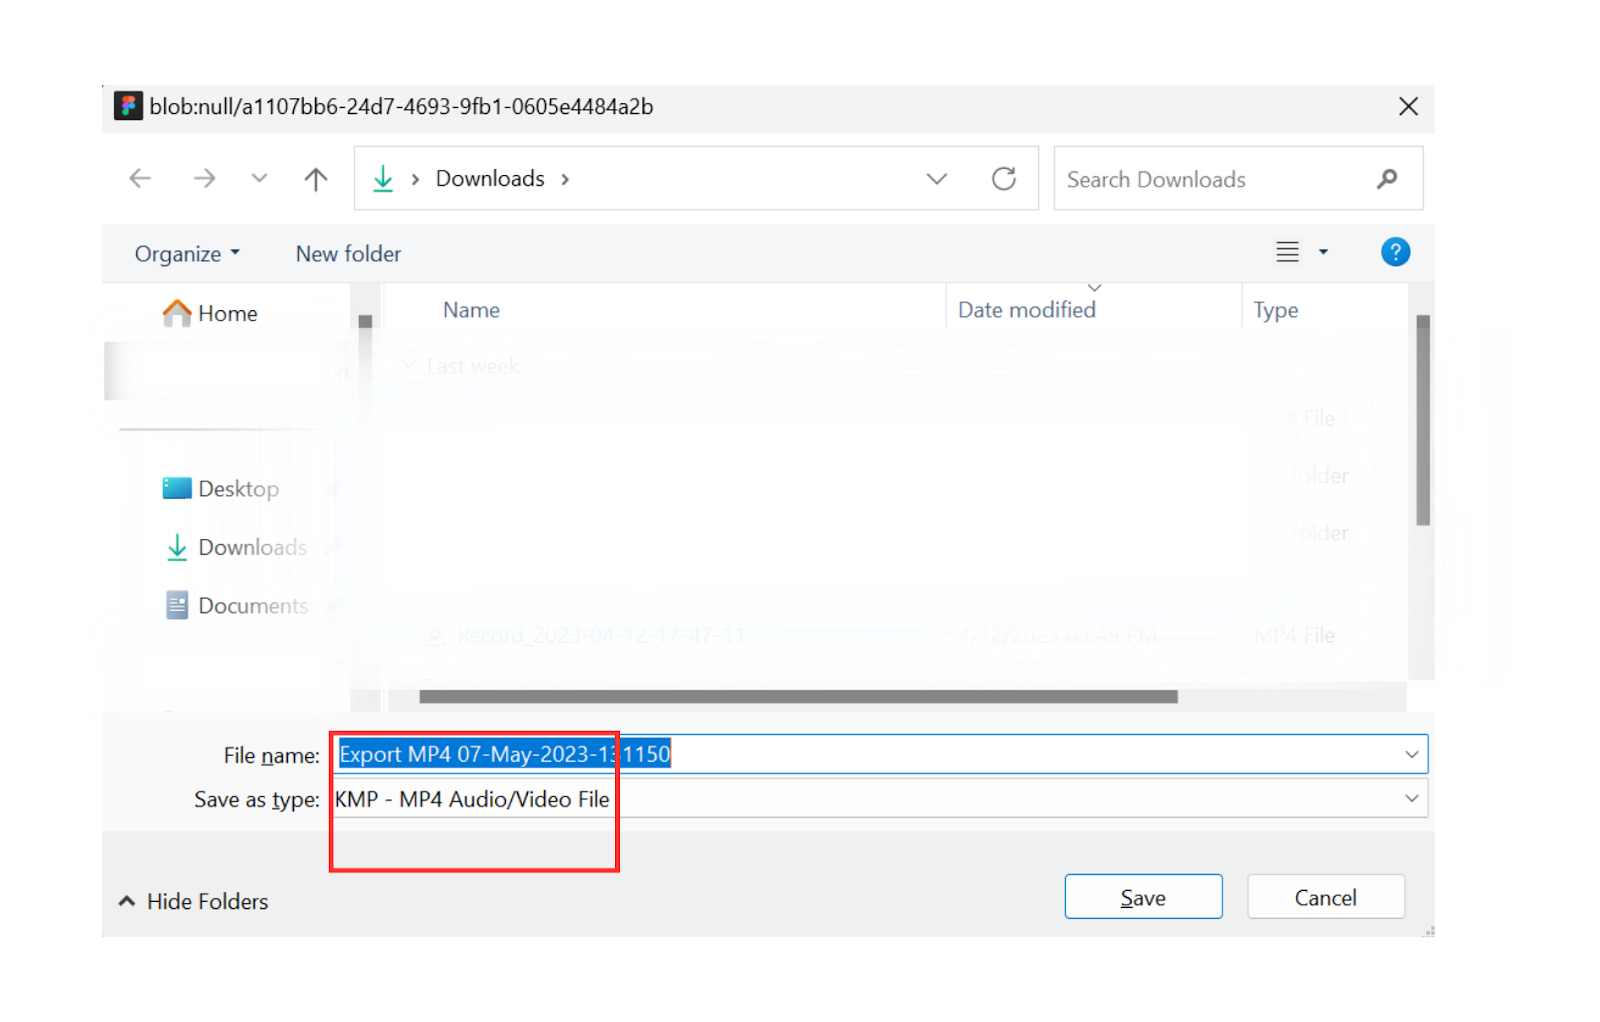
Step 5: Export the MP4 video
To export the video, change the video mode from animated to MP4. Alternatively, you have the option of exporting the animated video from Figma.
The video will be saved on your device as an MP4 file.
And your MP4 video is exported from Figma and ready to roll in your projects!
Congrats! You’ve successfully exported the video from Figma.
Where can I use the exported videos from Figma?
The ability to export videos from Figma can be applied in various situations and for various goals.
- Marketing: Exporting videos from Figma can help you create compelling ads or marketing campaigns that attract more customers and generate more sales.
- Social media: Ideos are a fantastic way to interact with your social media followers. You can use Figma to create stunning videos that showcase your brand, products, or services and then share them on platforms like Instagram, Facebook, or TikTok.
- Web design: If you’re a web designer, you can use Figma’s video exporting feature to create interactive prototypes or demos of your designs, which can help you get feedback from clients or stakeholders.
- Education: Figma’s video exporting feature can be used to create educational videos that explain concepts or processes visually appealingly. It’s advantageous for educators, trainers, and anyone wishing to pass on knowledge to others.
With Figma editing, the possibilities are truly endless.
Conclusion
Videos are a fantastic way to add some visual flair and engagement to your online content. You can quickly and easily export your designs as MP4 videos and share them with your audience by following the easy steps given in this blog.
So, why not try to export MP4 videos from Figma for your next design project? You can elevate your videos and produce an unforgettable user experience using Figma’s user-friendly interface and strong design skills.
Get creative and start exporting some amazing videos today!
Frequently asked questions: Exporting animated videos from Figma
Q. Can I export videos from Figma with custom dimensions?
Yes, you can set custom dimensions for your exported videos in Figma. You can either choose from pre-set dimensions or enter your own.
Q. Can I edit my exported videos from Figma in other video editing software?
Yes, you can edit your exported videos in other video editing software, such as Adobe Premiere Pro or Final Cut Pro.
Q. Does Figma’s video exporting feature require any special hardware or software?
No, Figma’s video exporting feature requires no special hardware or software. Any device with an internet connection and a web browser can use it.
Also read: